A Roblox UI is not finished just because it appears on screen. A menu that looks fine on desktop may overlap on a phone, a small button may be difficult to tap, or status information may enter a device safe area. When the UI needs custom artwork, you also have to create the files, upload them to Roblox, find the asset IDs, and set the right Studio properties.
Ask an AI agent connected to WEPPY to build the UI, and it can create the screen in Studio, capture the result, and revise the parts that need work. WEPPY can also upload the required images through Roblox Open Cloud and apply them to the UI.
Ask the AI to build the UI in Roblox Studio
For example, you can give the agent a request like this:
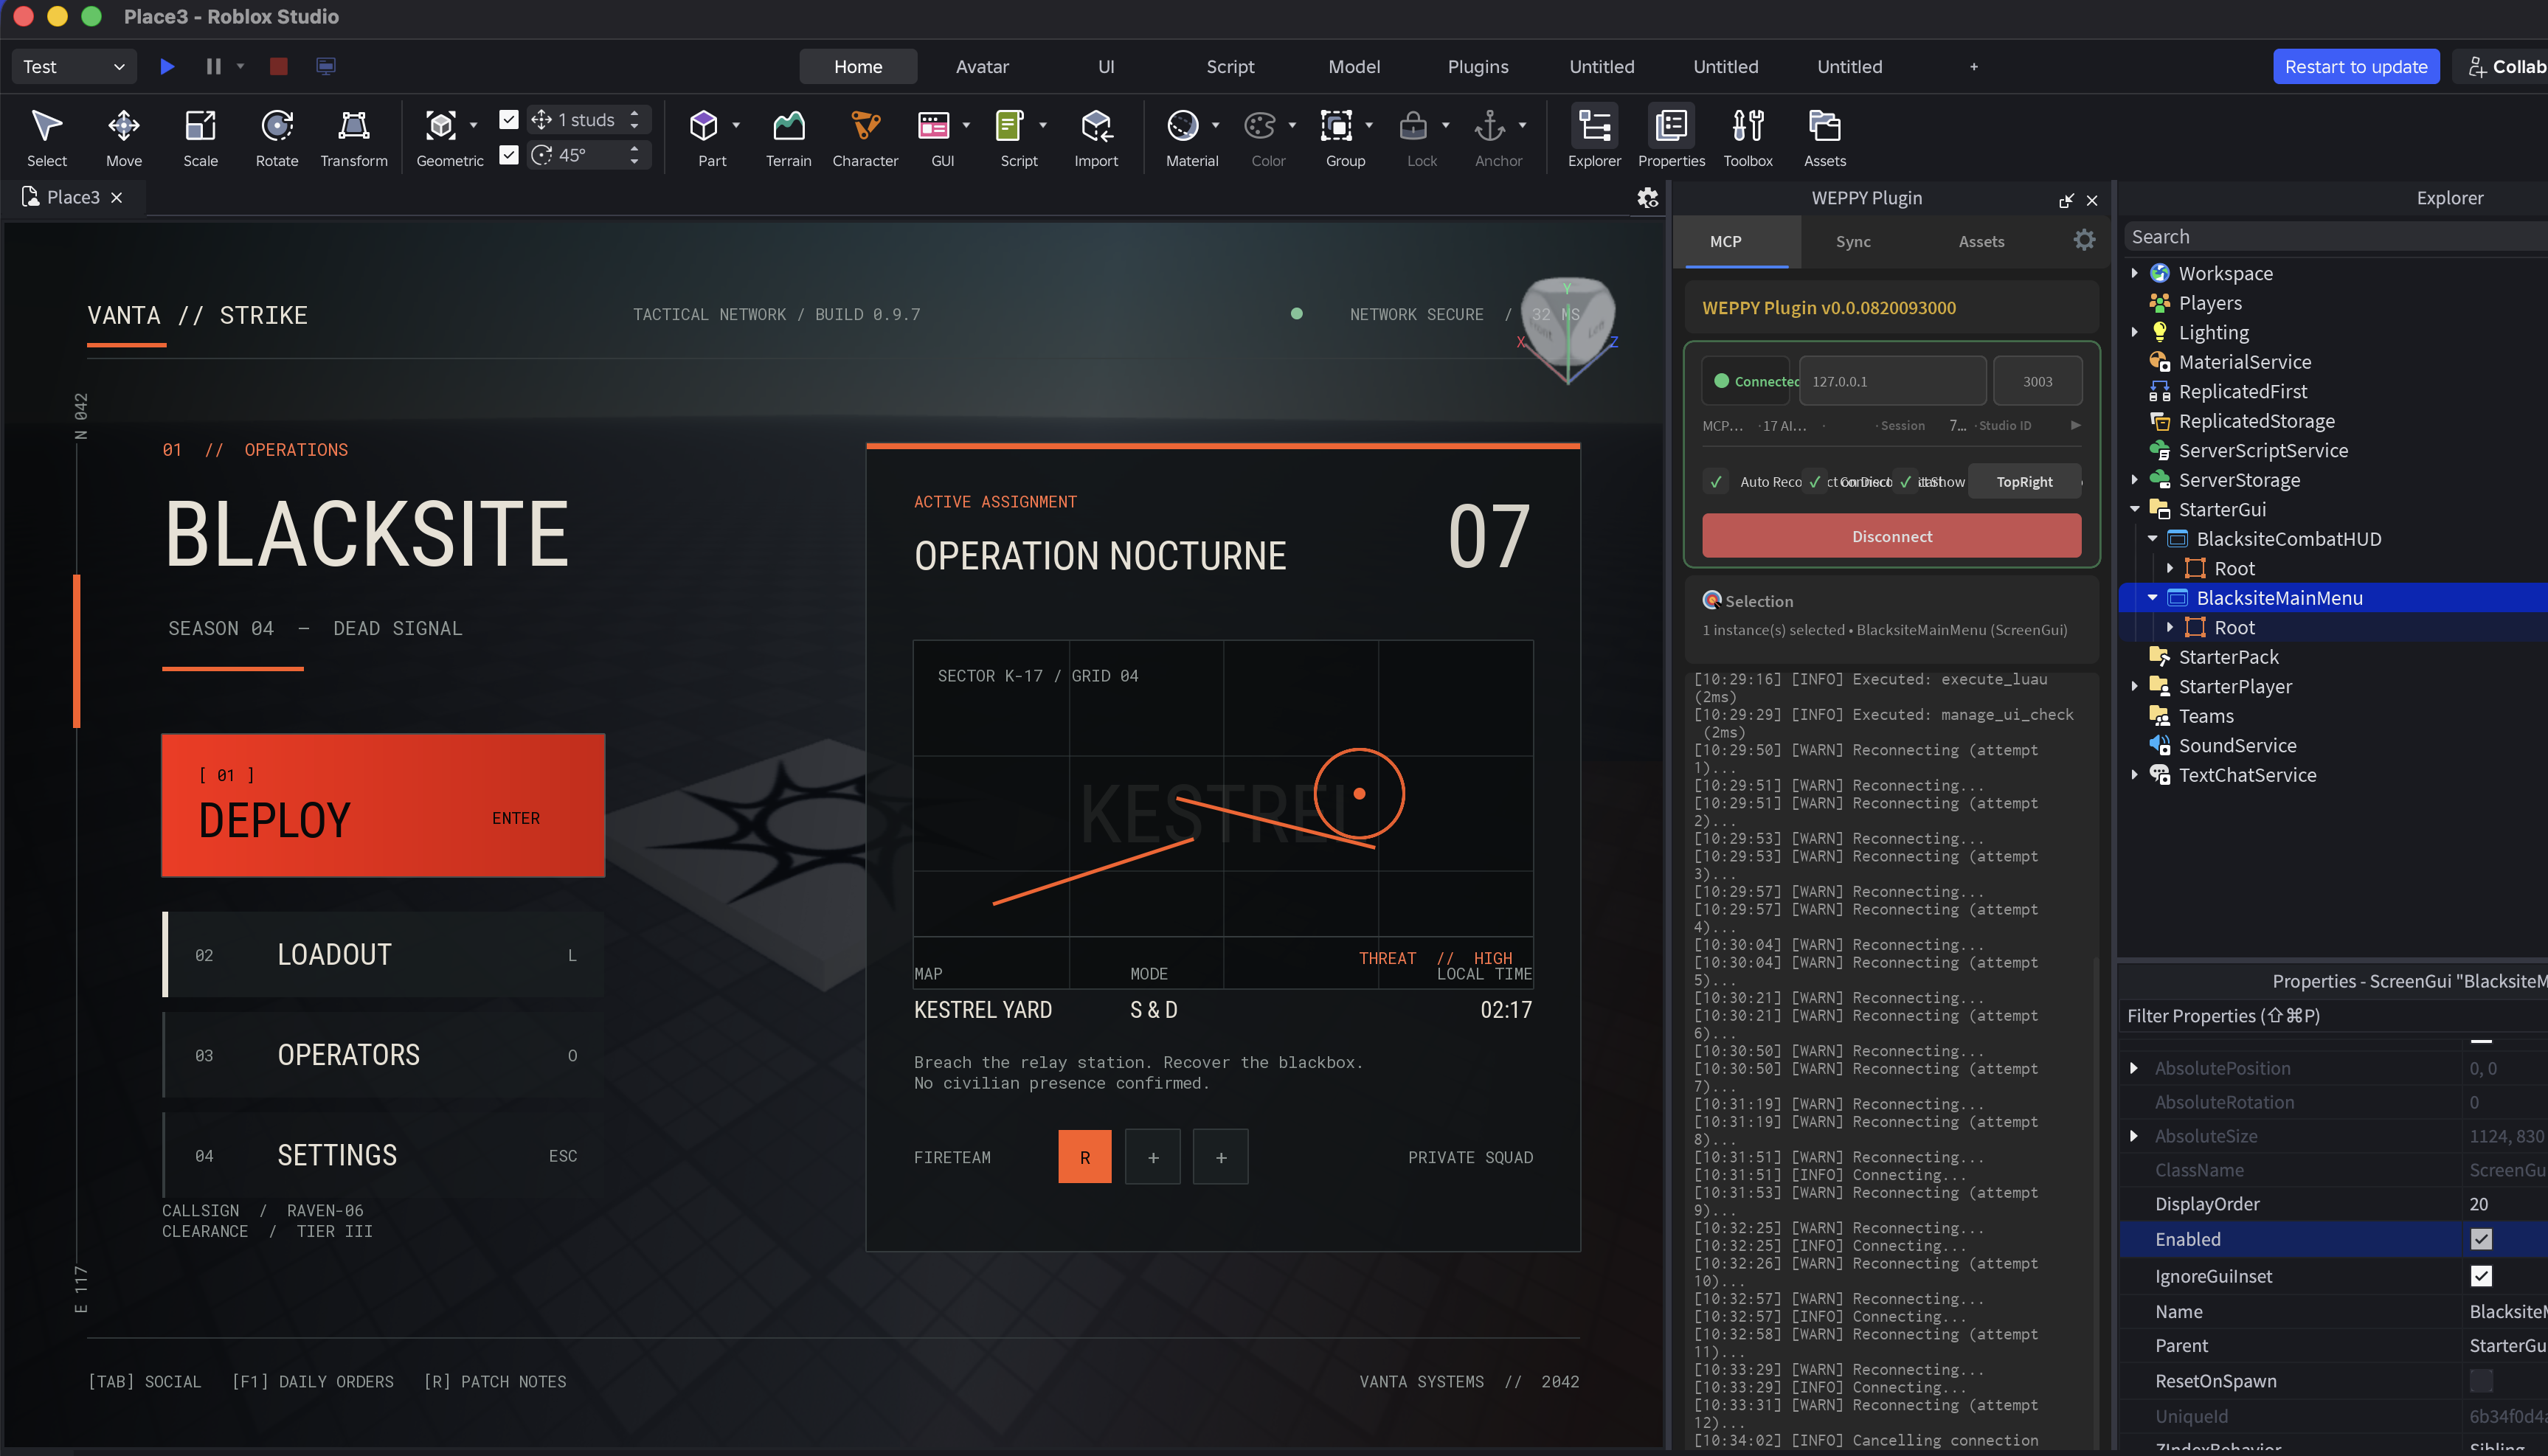
Create a main menu for a tactical operations game.
Put the operation menu on the left and the current mission and map in the center.
Prioritize desktop, but keep the main actions from overlapping on a phone in landscape mode.
WEPPY reads the current StarterGui and selected UI so the agent can decide whether to create a new screen or update an existing one. The agent organizes the screen purpose, primary actions, information hierarchy, and target devices, then builds Roblox UI objects such as ScreenGui, Frame, TextLabel, and ImageLabel.
A full-screen main menu and an in-game HUD have different jobs. The agent can compose each screen around its role and apply the result directly to Studio through WEPPY.
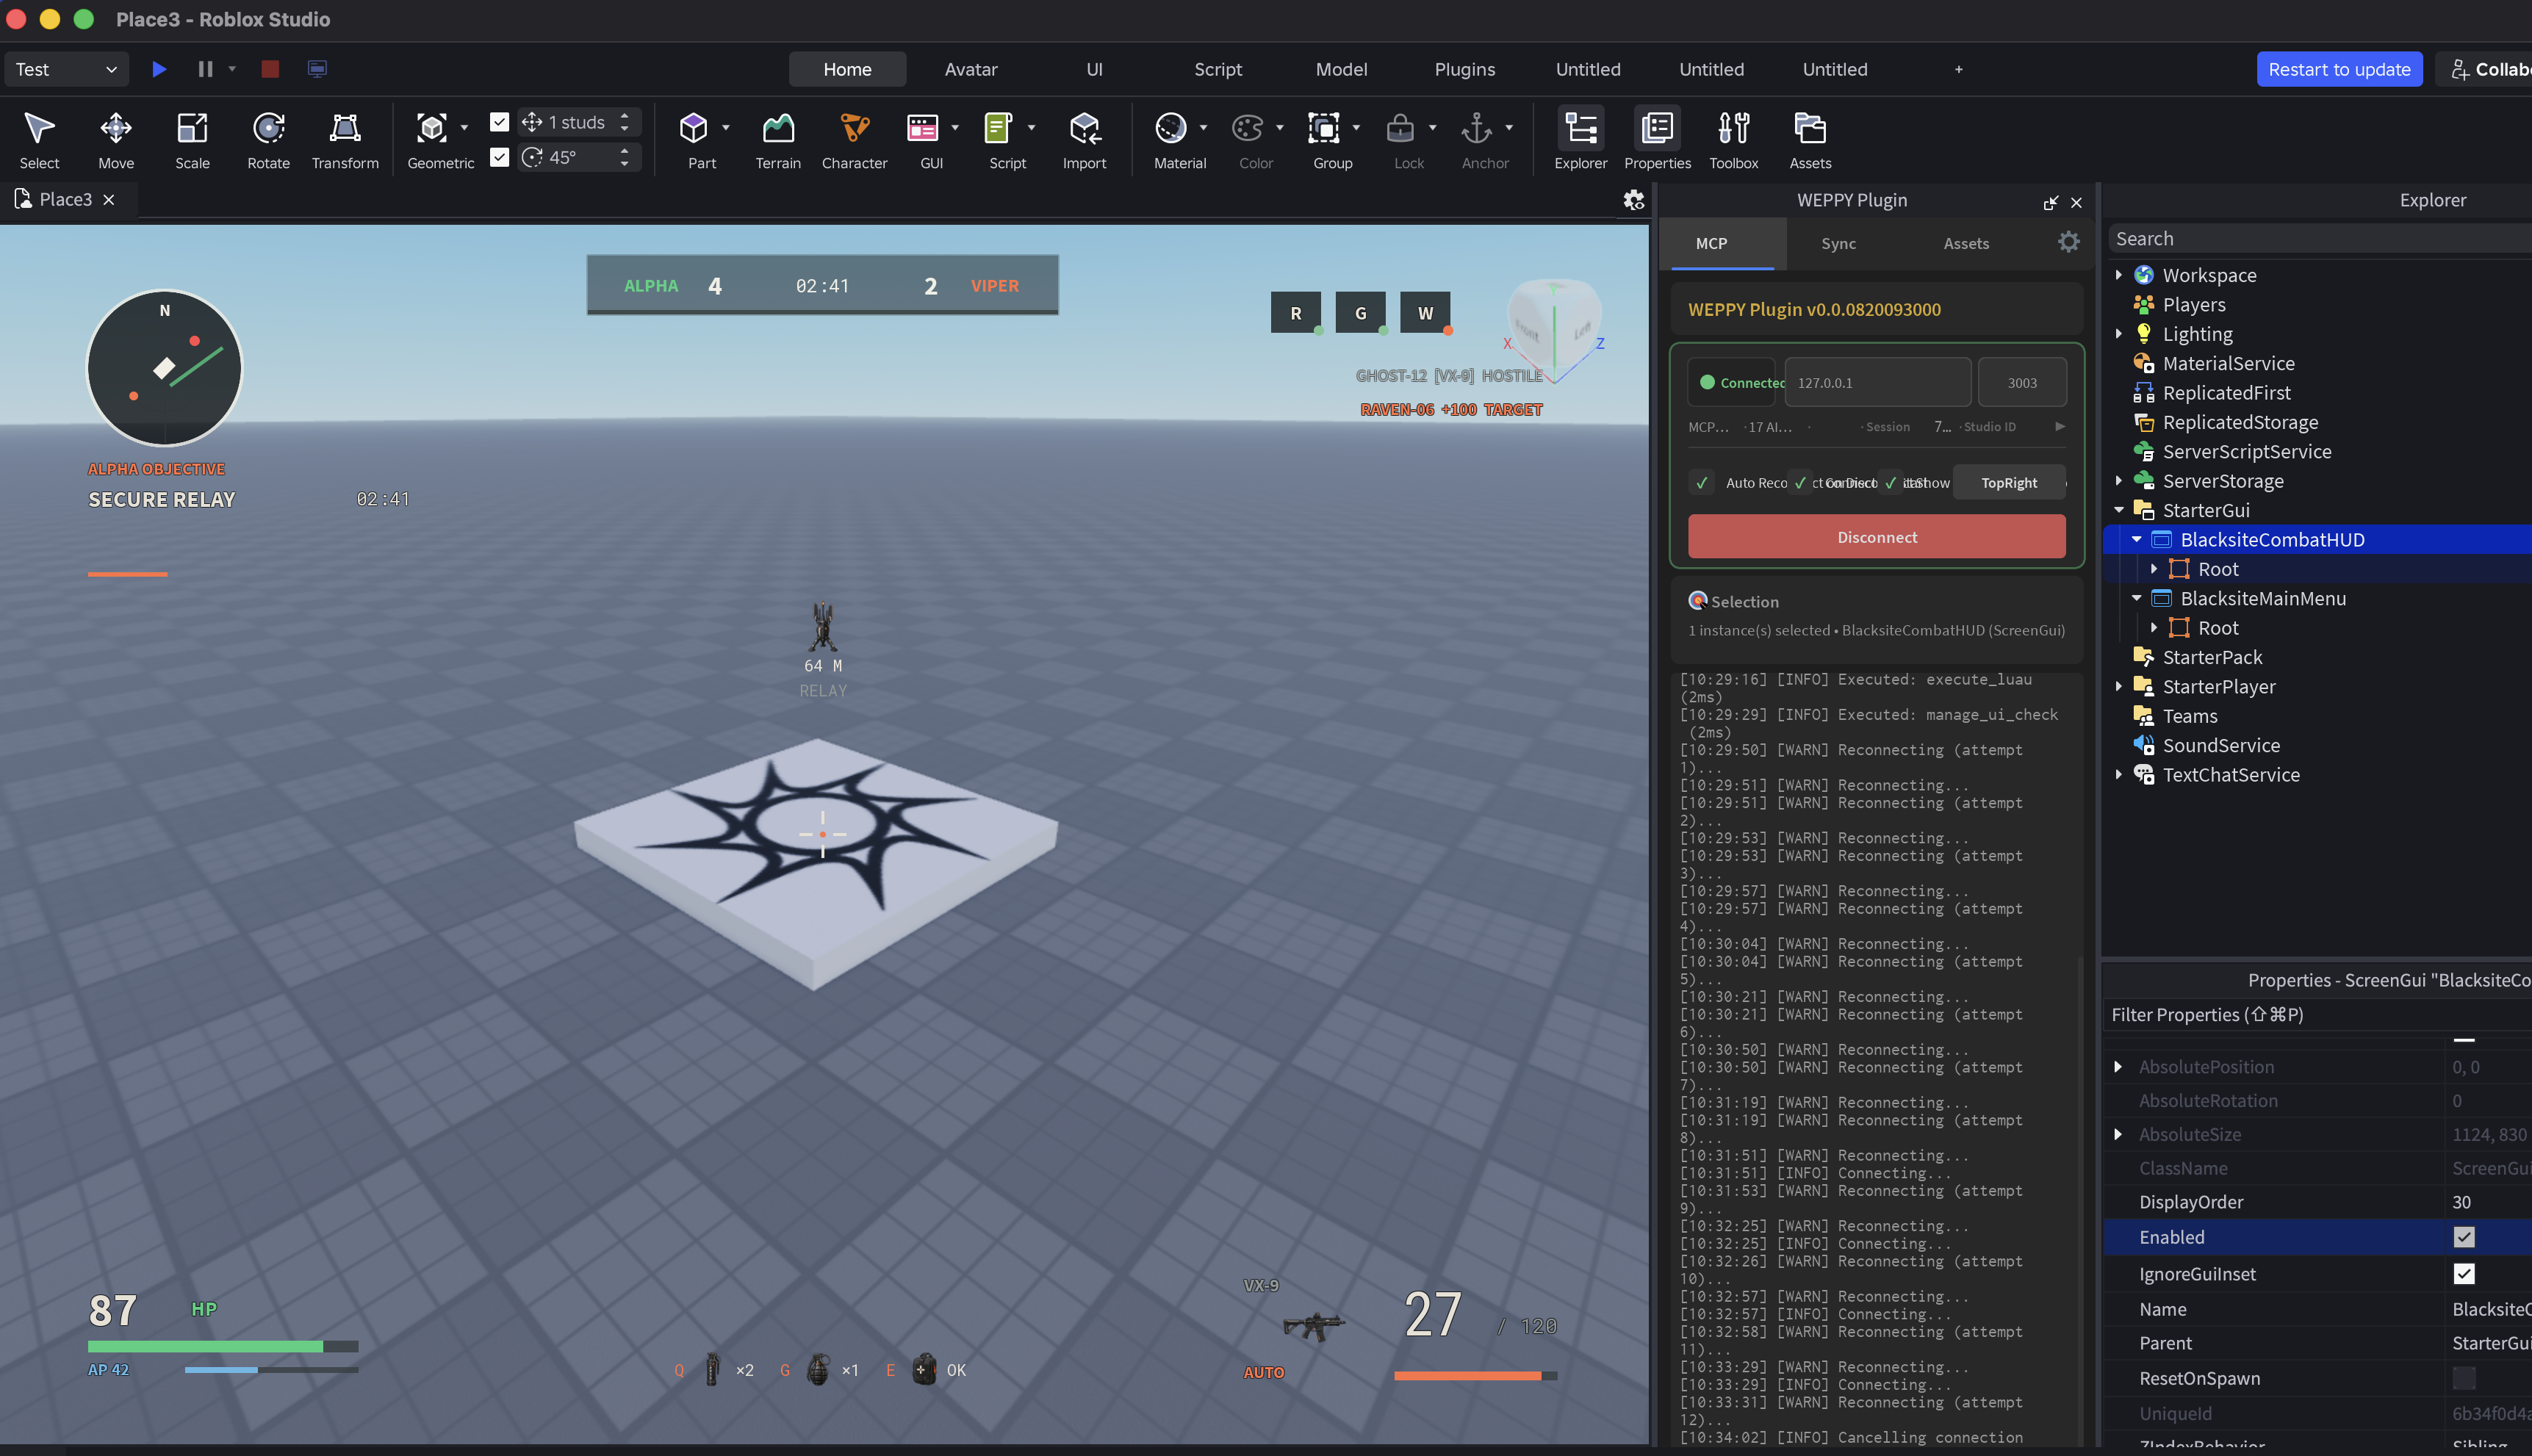
This HUD keeps the information needed during play near the edges of the screen. The minimap, objective, team score, health, equipment, and ammunition remain readable without taking over the center of the play area.
Capture the result and find what needs improvement
After creating the UI, capture its current state and review the actual layout. UI Studio in the WEPPY Dashboard keeps the before-and-after screens and the recorded changes, and it can refresh improvement suggestions for the same target.
The review goes beyond syntax. It checks resolved UI size and position for issues such as:
- interaction areas that are too small for the target input method
- text size and foreground-to-background contrast
- important information or actions entering a device safe area
- elements overflowing or overlapping at smaller sizes
- access to primary actions with keyboard, gamepad, or touch
- HUD elements covering an important part of the gameplay view
Each suggestion includes the affected path, the observed state, and a recommended change. Send the suggestion back to the agent to update only the affected UI objects, capture a new result, and compare the change.
Review the platforms and screen sizes that matter
One screen size cannot reveal every responsive issue. A WEPPY UI brief can include prioritized targets such as desktop, phone, tablet, and console, together with orientation and input method. Start with the primary screen, then expand the review to the compatibility targets the project needs.
When Roblox Studio supports device simulation for a selected target, WEPPY can apply that viewport profile’s size, orientation, and input context before capturing and checking the UI. A button overlap that appears only on a smaller landscape viewport can then be reported with the affected path and resolved geometry.
The result also records what was actually reviewed. If device simulation is unavailable, WEPPY can still check the current viewport but marks the responsive review as skipped. Zero suggestions therefore means no issue was found in the checks that ran, not that every platform and interaction state passed. Current UI capture runs in Roblox Studio Edit mode; capture during a playtest is not supported.
Let WEPPY upload and apply the images
Character portraits, icons, background patterns, and button artwork can make the UI easier to recognize. A Codex environment or another AI agent with access to an image-generation tool such as ImageGen can create these files locally. Once you choose the images, WEPPY continues with Asset Library storage, Roblox Open Cloud upload, and UI application. WEPPY does not call an external image model itself; it connects the agent’s image capability with its asset workflow.
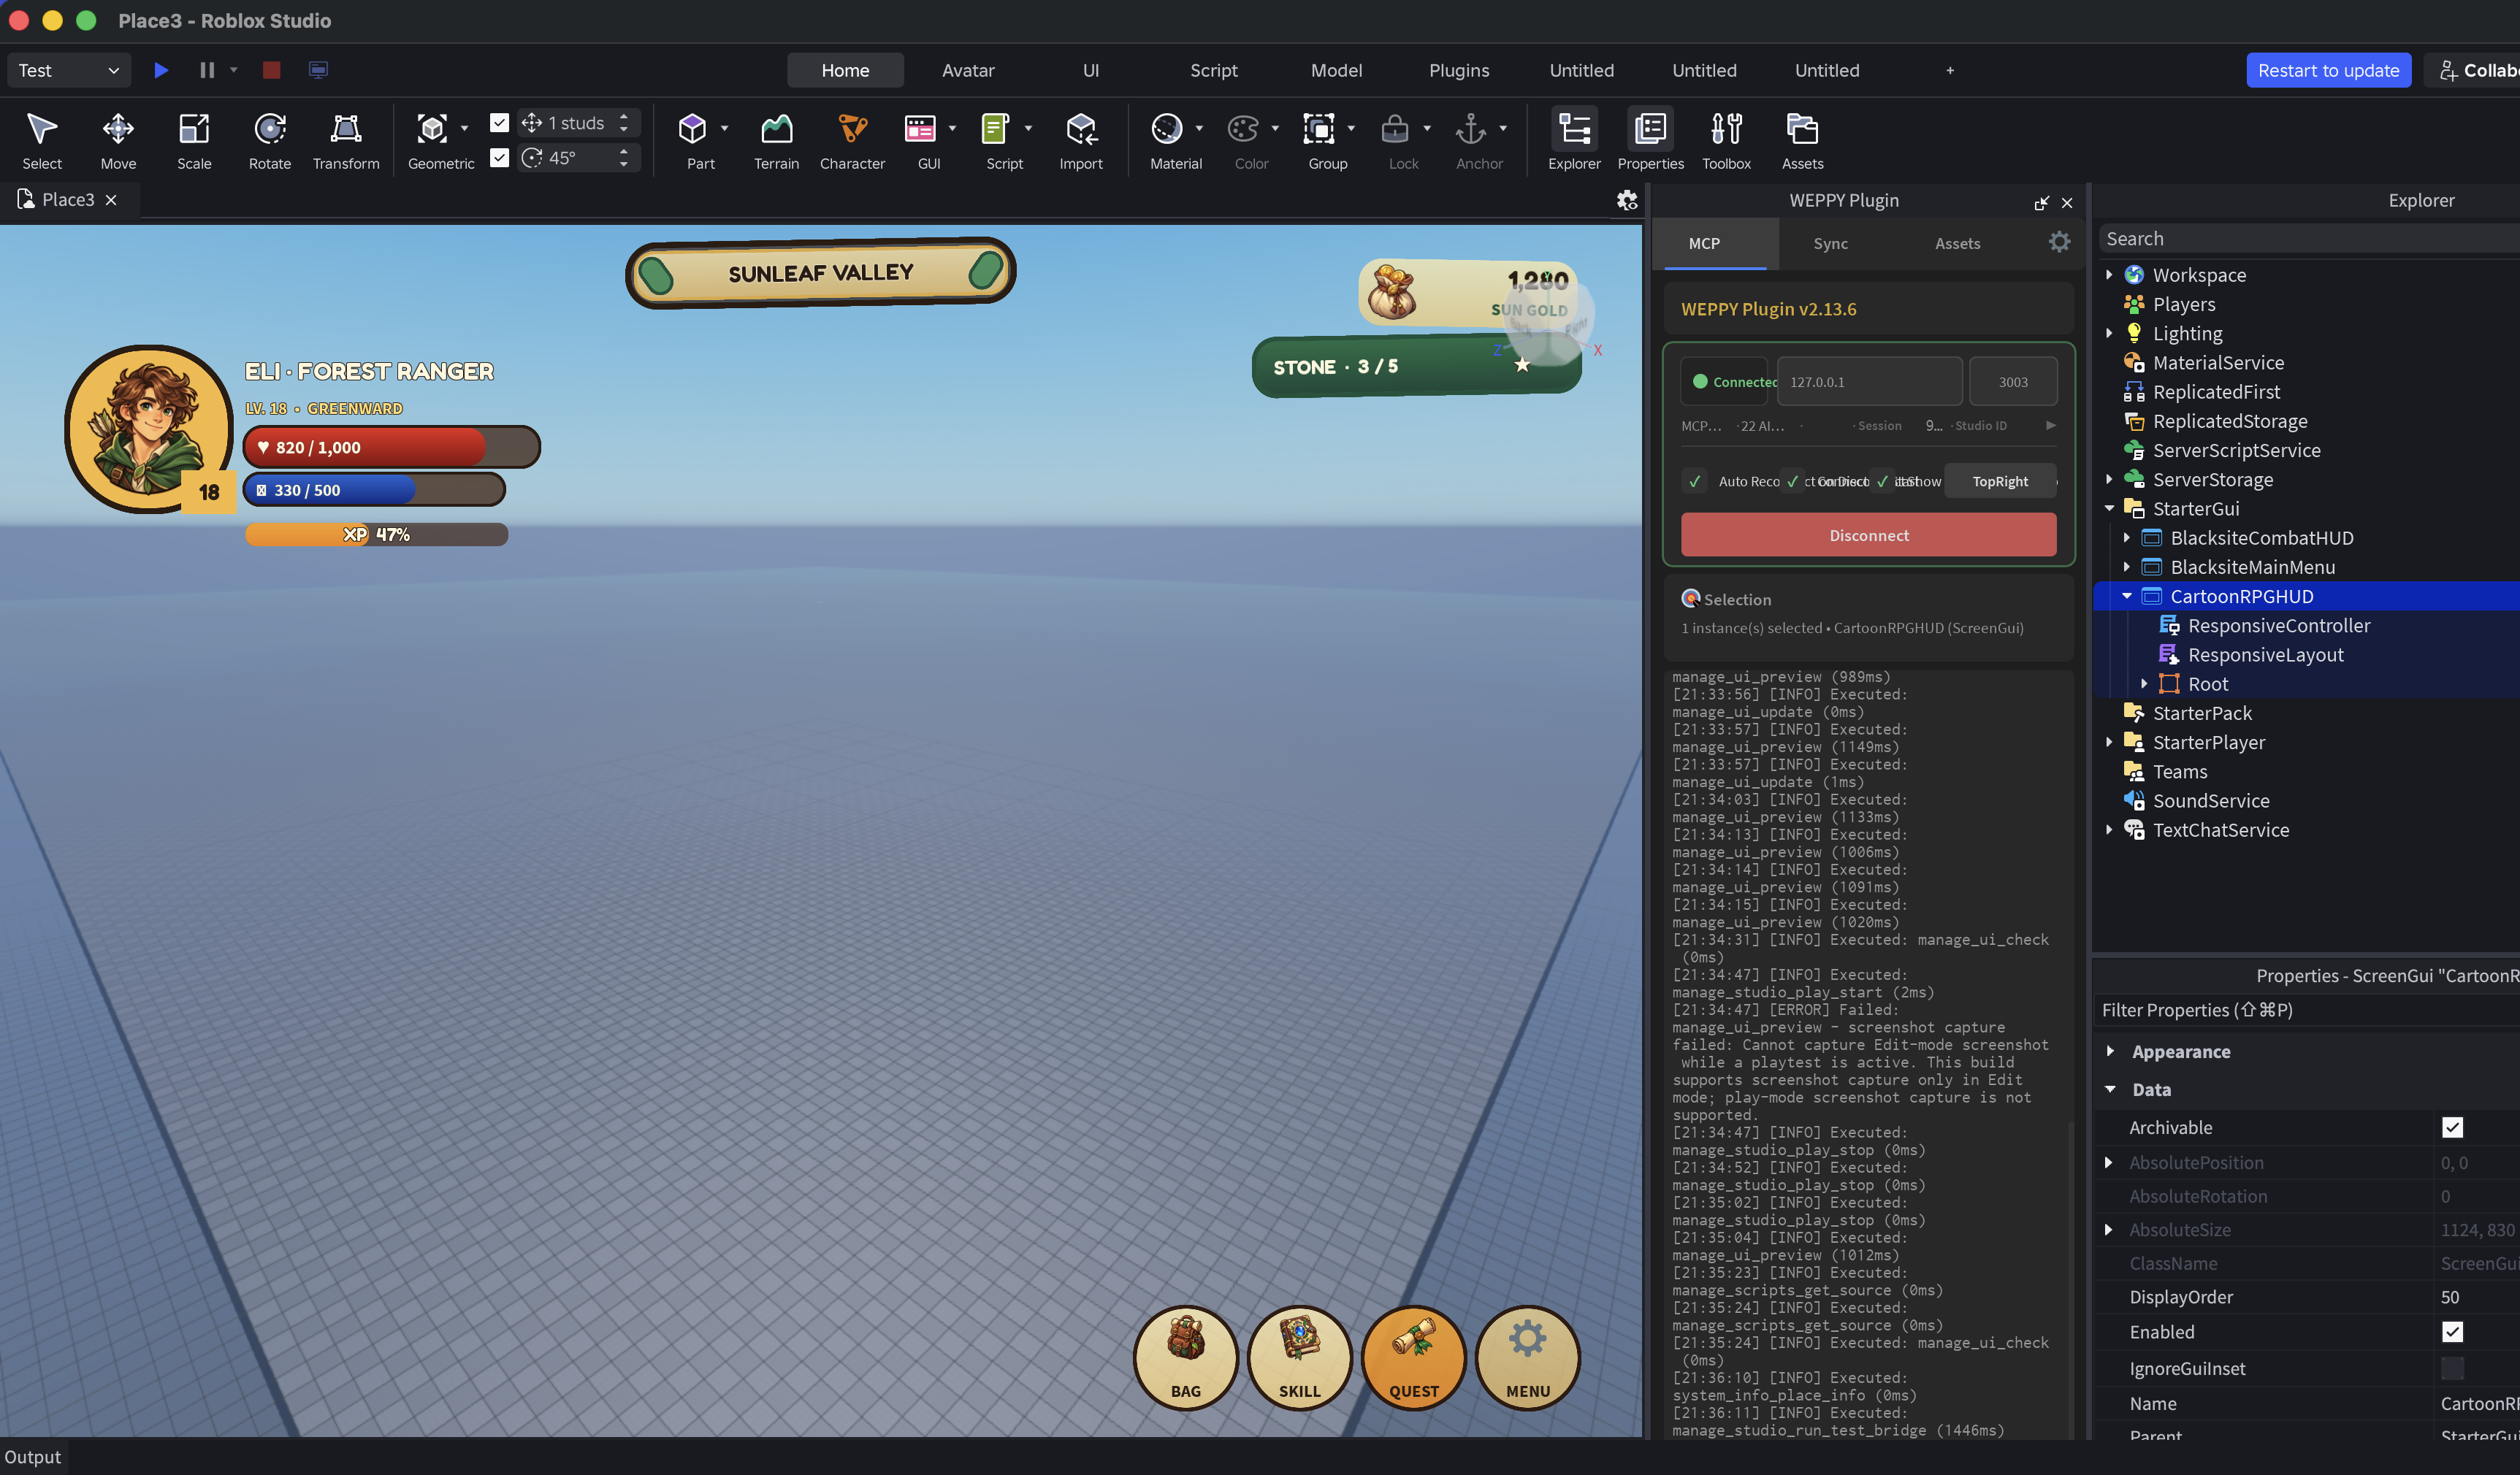
For a screen like this, the workflow is:
- The AI agent creates image candidates that match the UI role and visual direction.
- You review the images and choose the files to use.
- WEPPY saves the selected files to Asset Library and checks the Open Cloud setup and target Creator.
- After approval, WEPPY automatically uploads the images through Roblox Open Cloud and waits for processing to complete.
- WEPPY applies the returned
rbxassetid://...URI to properties such asImageLabel,ImageButton,Decal, orTexture. - The agent captures the UI again and checks the composition and readability with the final artwork in place.
Before upload, you only confirm the files and target Creator. After approval, WEPPY handles the Open Cloud request, operation status, and asset URI application. With an Open Cloud API key that has the required Assets permissions, you do not need to open Creator Dashboard, upload each file, and copy its ID back into Studio.
Keep the loop short
In practice, repeat request → build → capture → check → update in small steps. Stabilize the layout and primary actions before generating and uploading artwork. This avoids redoing asset work after a large layout change.
Include the screens and review conditions in the request so the agent knows what “done” means:
Create a play HUD for a cartoon RPG.
Include character status, area name, currency, the current objective, and a bottom menu.
Use desktop as the primary screen and also review a phone in landscape mode.
Check touch targets, text overlap, safe areas, and whether the HUD blocks the center view, then fix the issues.

When the layout is ready, generate a character portrait and menu icons and show them to me.
Upload only the images I select to Roblox, apply them to the ImageLabels,
and capture the final screen again.
The useful part is not a single generated screen. It is the repeatable review loop around it. With WEPPY, the agent can build Roblox UI in Studio, inspect problems across the declared screen and input conditions, and continue through image generation, upload, and application without losing the context of the task.