WEPPY is an MCP server that connects AI coding agents directly to Roblox Studio.
AI coding agents like Claude, Codex, and Gemini are powerful, but they can’t directly see or modify the DataModel, scripts, terrain, or lighting inside Roblox Studio. WEPPY bridges that gap. When the AI creates or modifies instances, scripts, properties, and terrain inside Studio, changes are reflected immediately in both Studio and the dashboard so you can see exactly what changed at a glance.
No copy-pasting required. The AI does the work; you verify the results.
Recommended Starting Path
If this is your first time, follow the steps below in order. Each step finishes with the minimum verification needed before moving to the next.
- Getting Started — Install the MCP server and Studio plugin, make your first connection
- Check Connections — Verify server, plugin, and agent status from the dashboard
- Multi-Place Work — Use Studio IDs to target the right Place in multiple Studio windows
- First Workflows — A safe path to validate your first task
- Sync — How bidirectional sync works and how to handle conflicts
- Change History / Playtest — Workflows for validating AI results
Key Features
1. MCP Tools — Control Studio with Natural Language
Scripts, instances, properties, terrain, lighting, assets, audio, animations — the AI handles all of it directly inside Studio.
- “Add a particle effect, sound, and cooldown when the player jumps.”
- “Build a boss arena in the center of the map and place spawn points without collisions.”
- “Change this module’s interface and update all scripts that reference it.”
2. Multi-Place — Work across several Places in one request
Open Lobby, Game, Shop, or Tutorial Places in separate Roblox Studio windows, then route work by Studio ID.
- “In studio-1, add the event portal to Lobby. In studio-2, add the arrival point and guide UI to Game.”
- See which Studio window belongs to which Place from the Dashboard, even when multiple agents are connected
- Reduce repeated context, manual copying, and accidental edits to the wrong Place
For targeting rules and a wrong-Place checklist, see the Multi-Place Work guide.
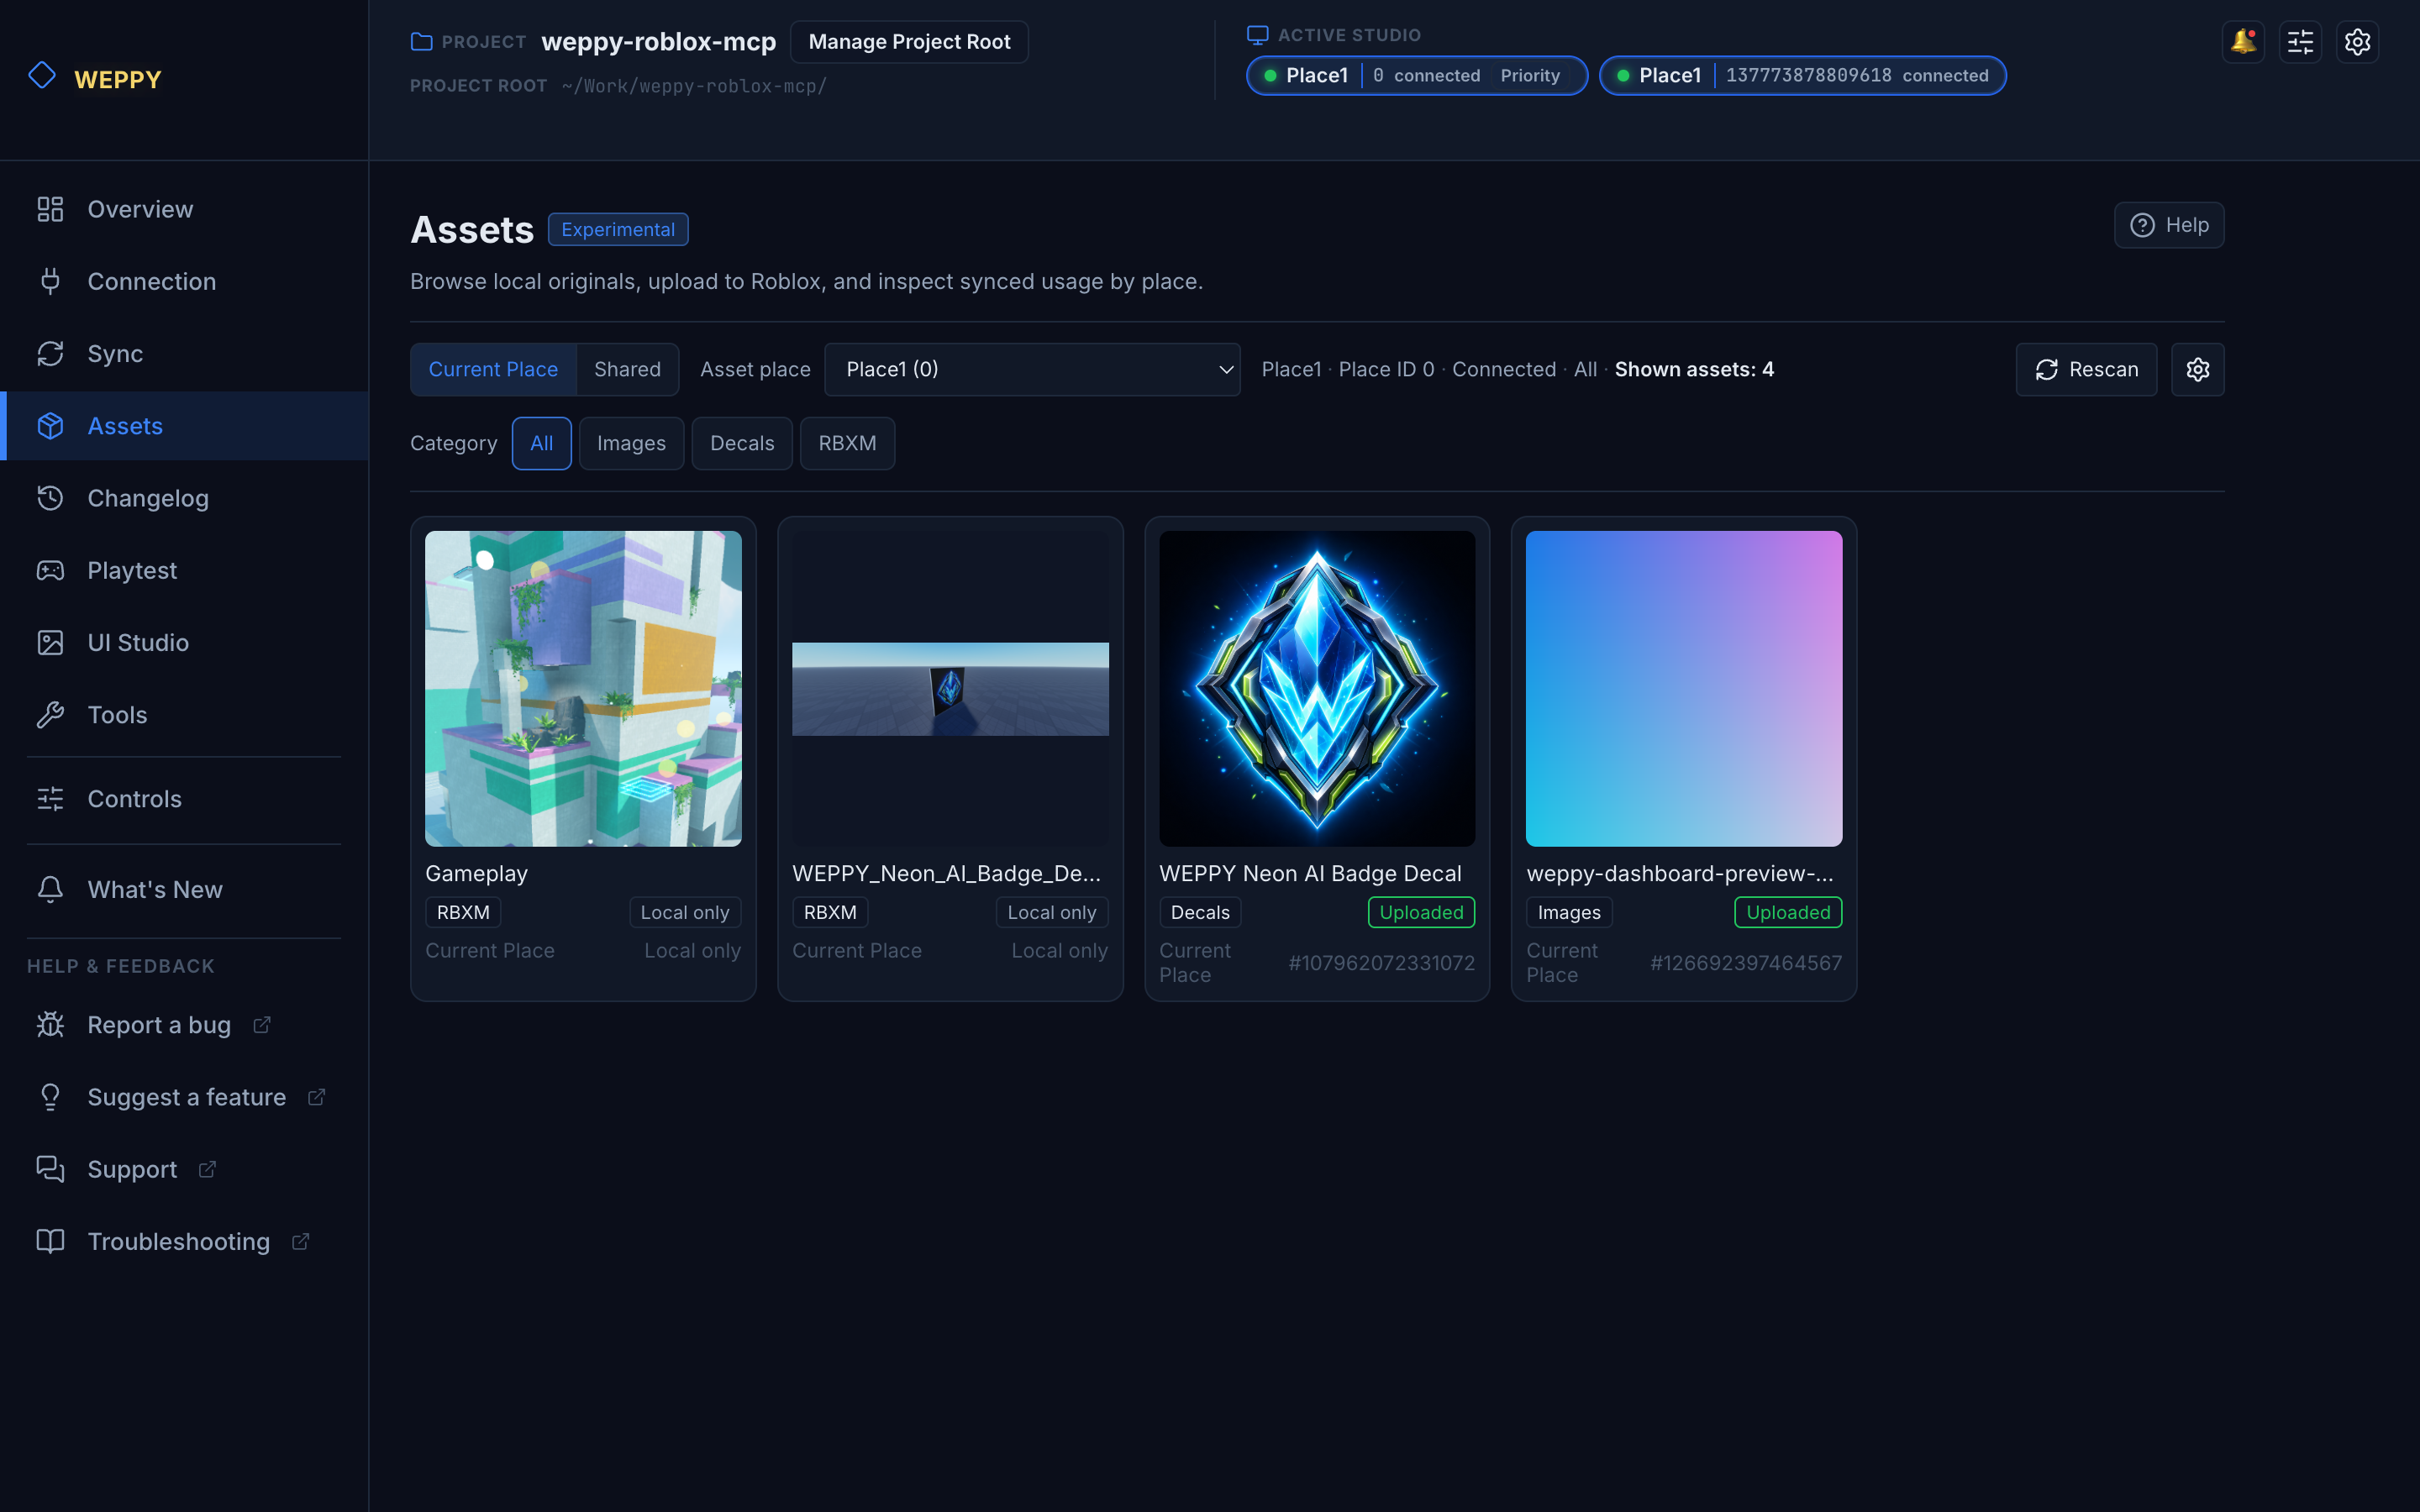
3. Assets — From generated image to applied Place asset
Save generated images or prepared RBXM files to the Asset Library, upload them to Roblox, then apply them to the current Place.
- “Create a gem icon for the shop button, upload it to Roblox, then apply it to the ShopButton image in the Lobby Place.”
- Manage place-specific assets and shared assets separately
- Apply the asset URI returned by Open Cloud upload to Studio properties
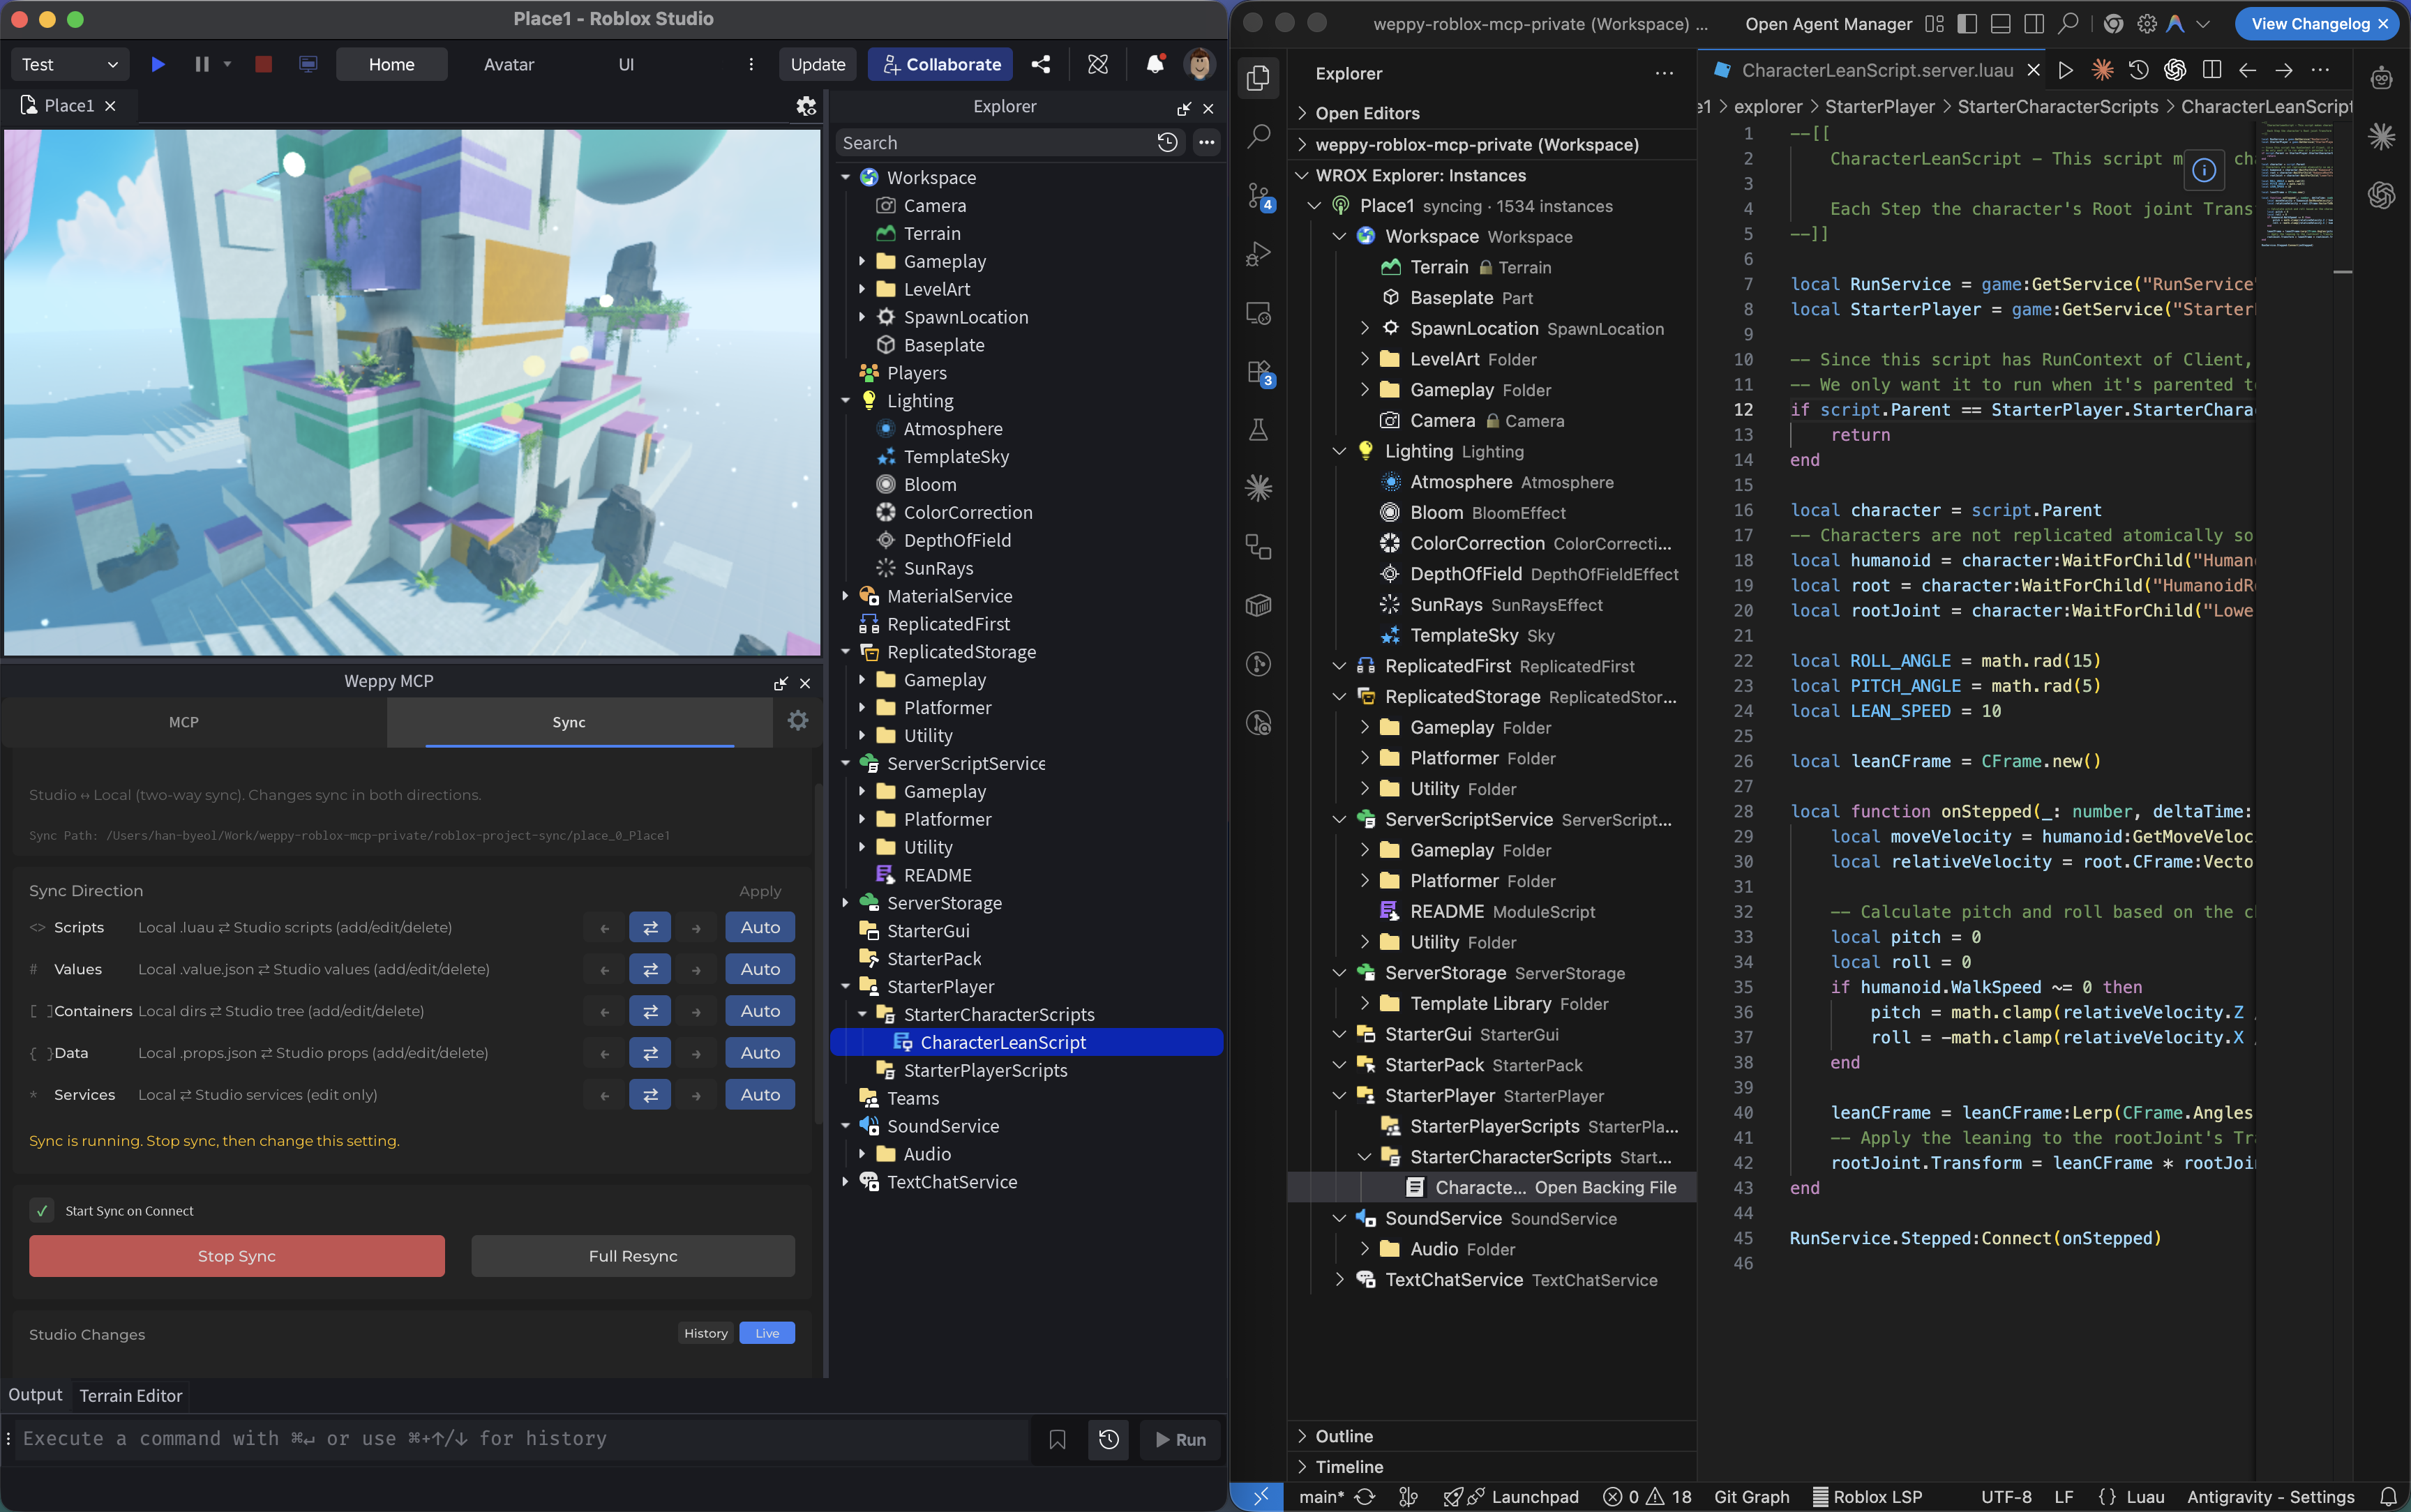
4. Sync — Keep the Entire Project Context Stable
The AI uses a locally synced project as its reference to understand the full structure and apply consistent changes across multiple files.
- Basic — Studio → Local one-way sync
- Pro — Bidirectional sync, per-type Direction/Apply Mode, change history, multi-place support
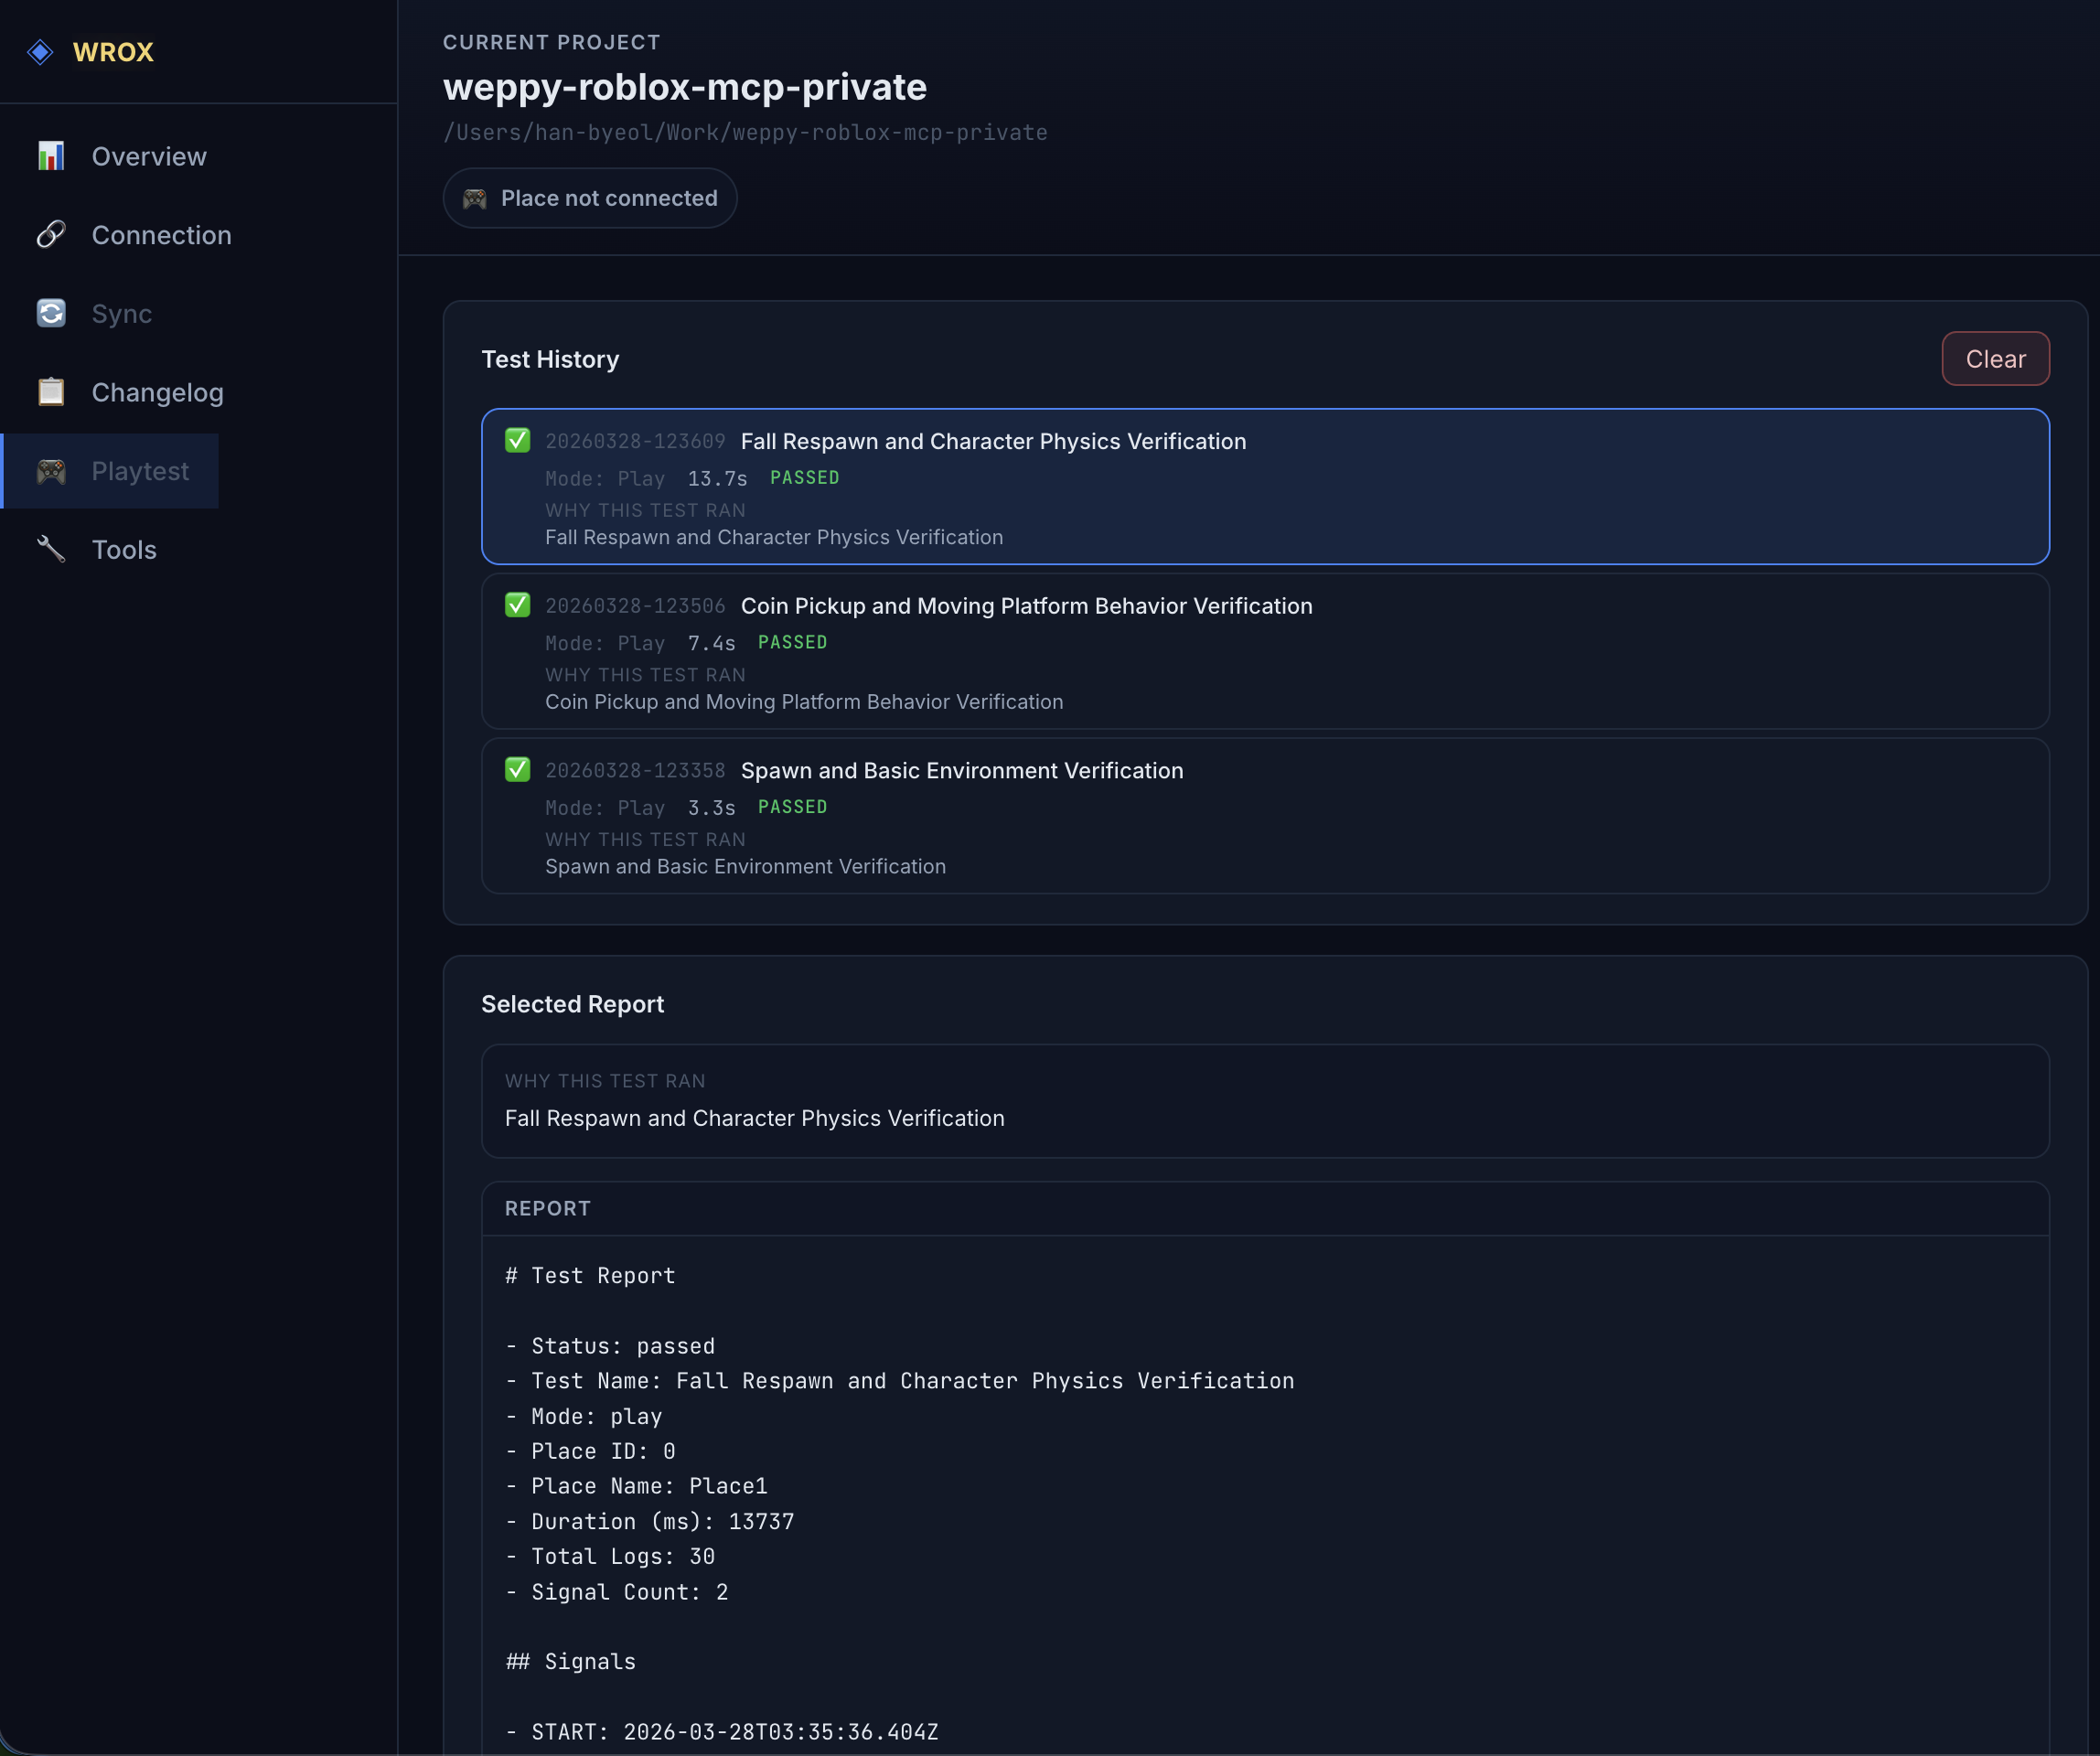
5. Playtest — AI Runs and Validates Tests Automatically
The AI controls Studio playtesting directly. It can start/stop F5 (Play) / F8 (Run) modes, inject test scripts, collect logs, and generate reports automatically.
- “Start a playtest in Run mode and verify that the NPC reaches its target.”
- “Write and auto-run a test script to check whether SpawnLocation is above the ground.”
- “Run a playtest to verify the script I just modified works without errors.”
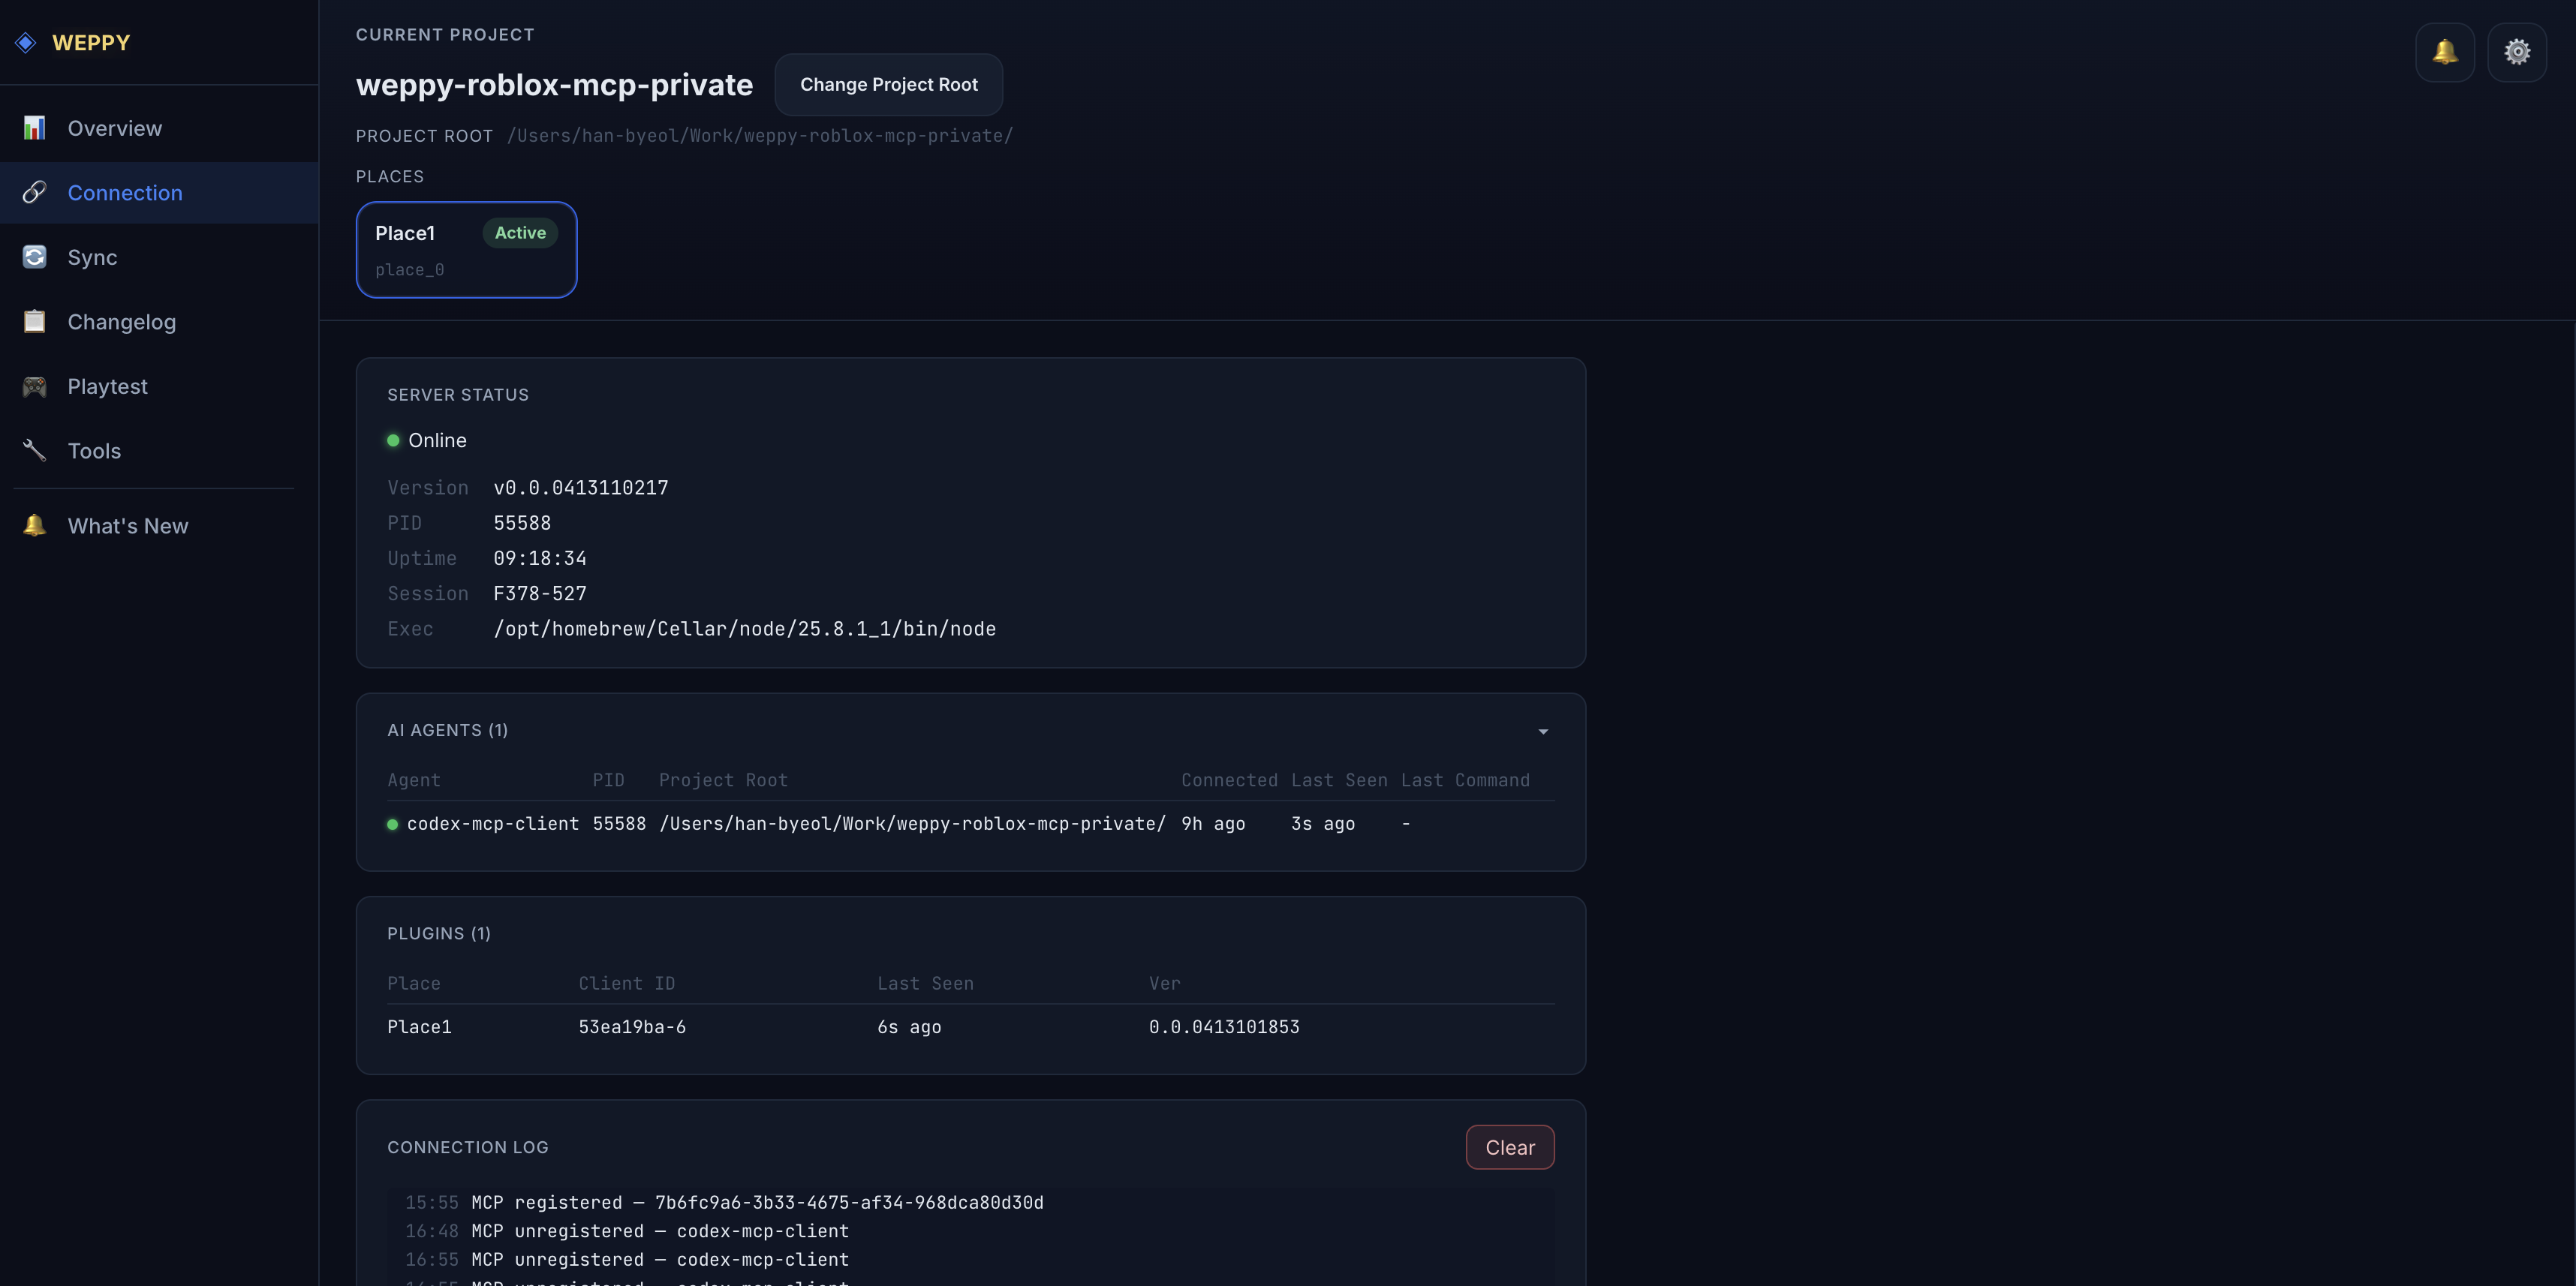
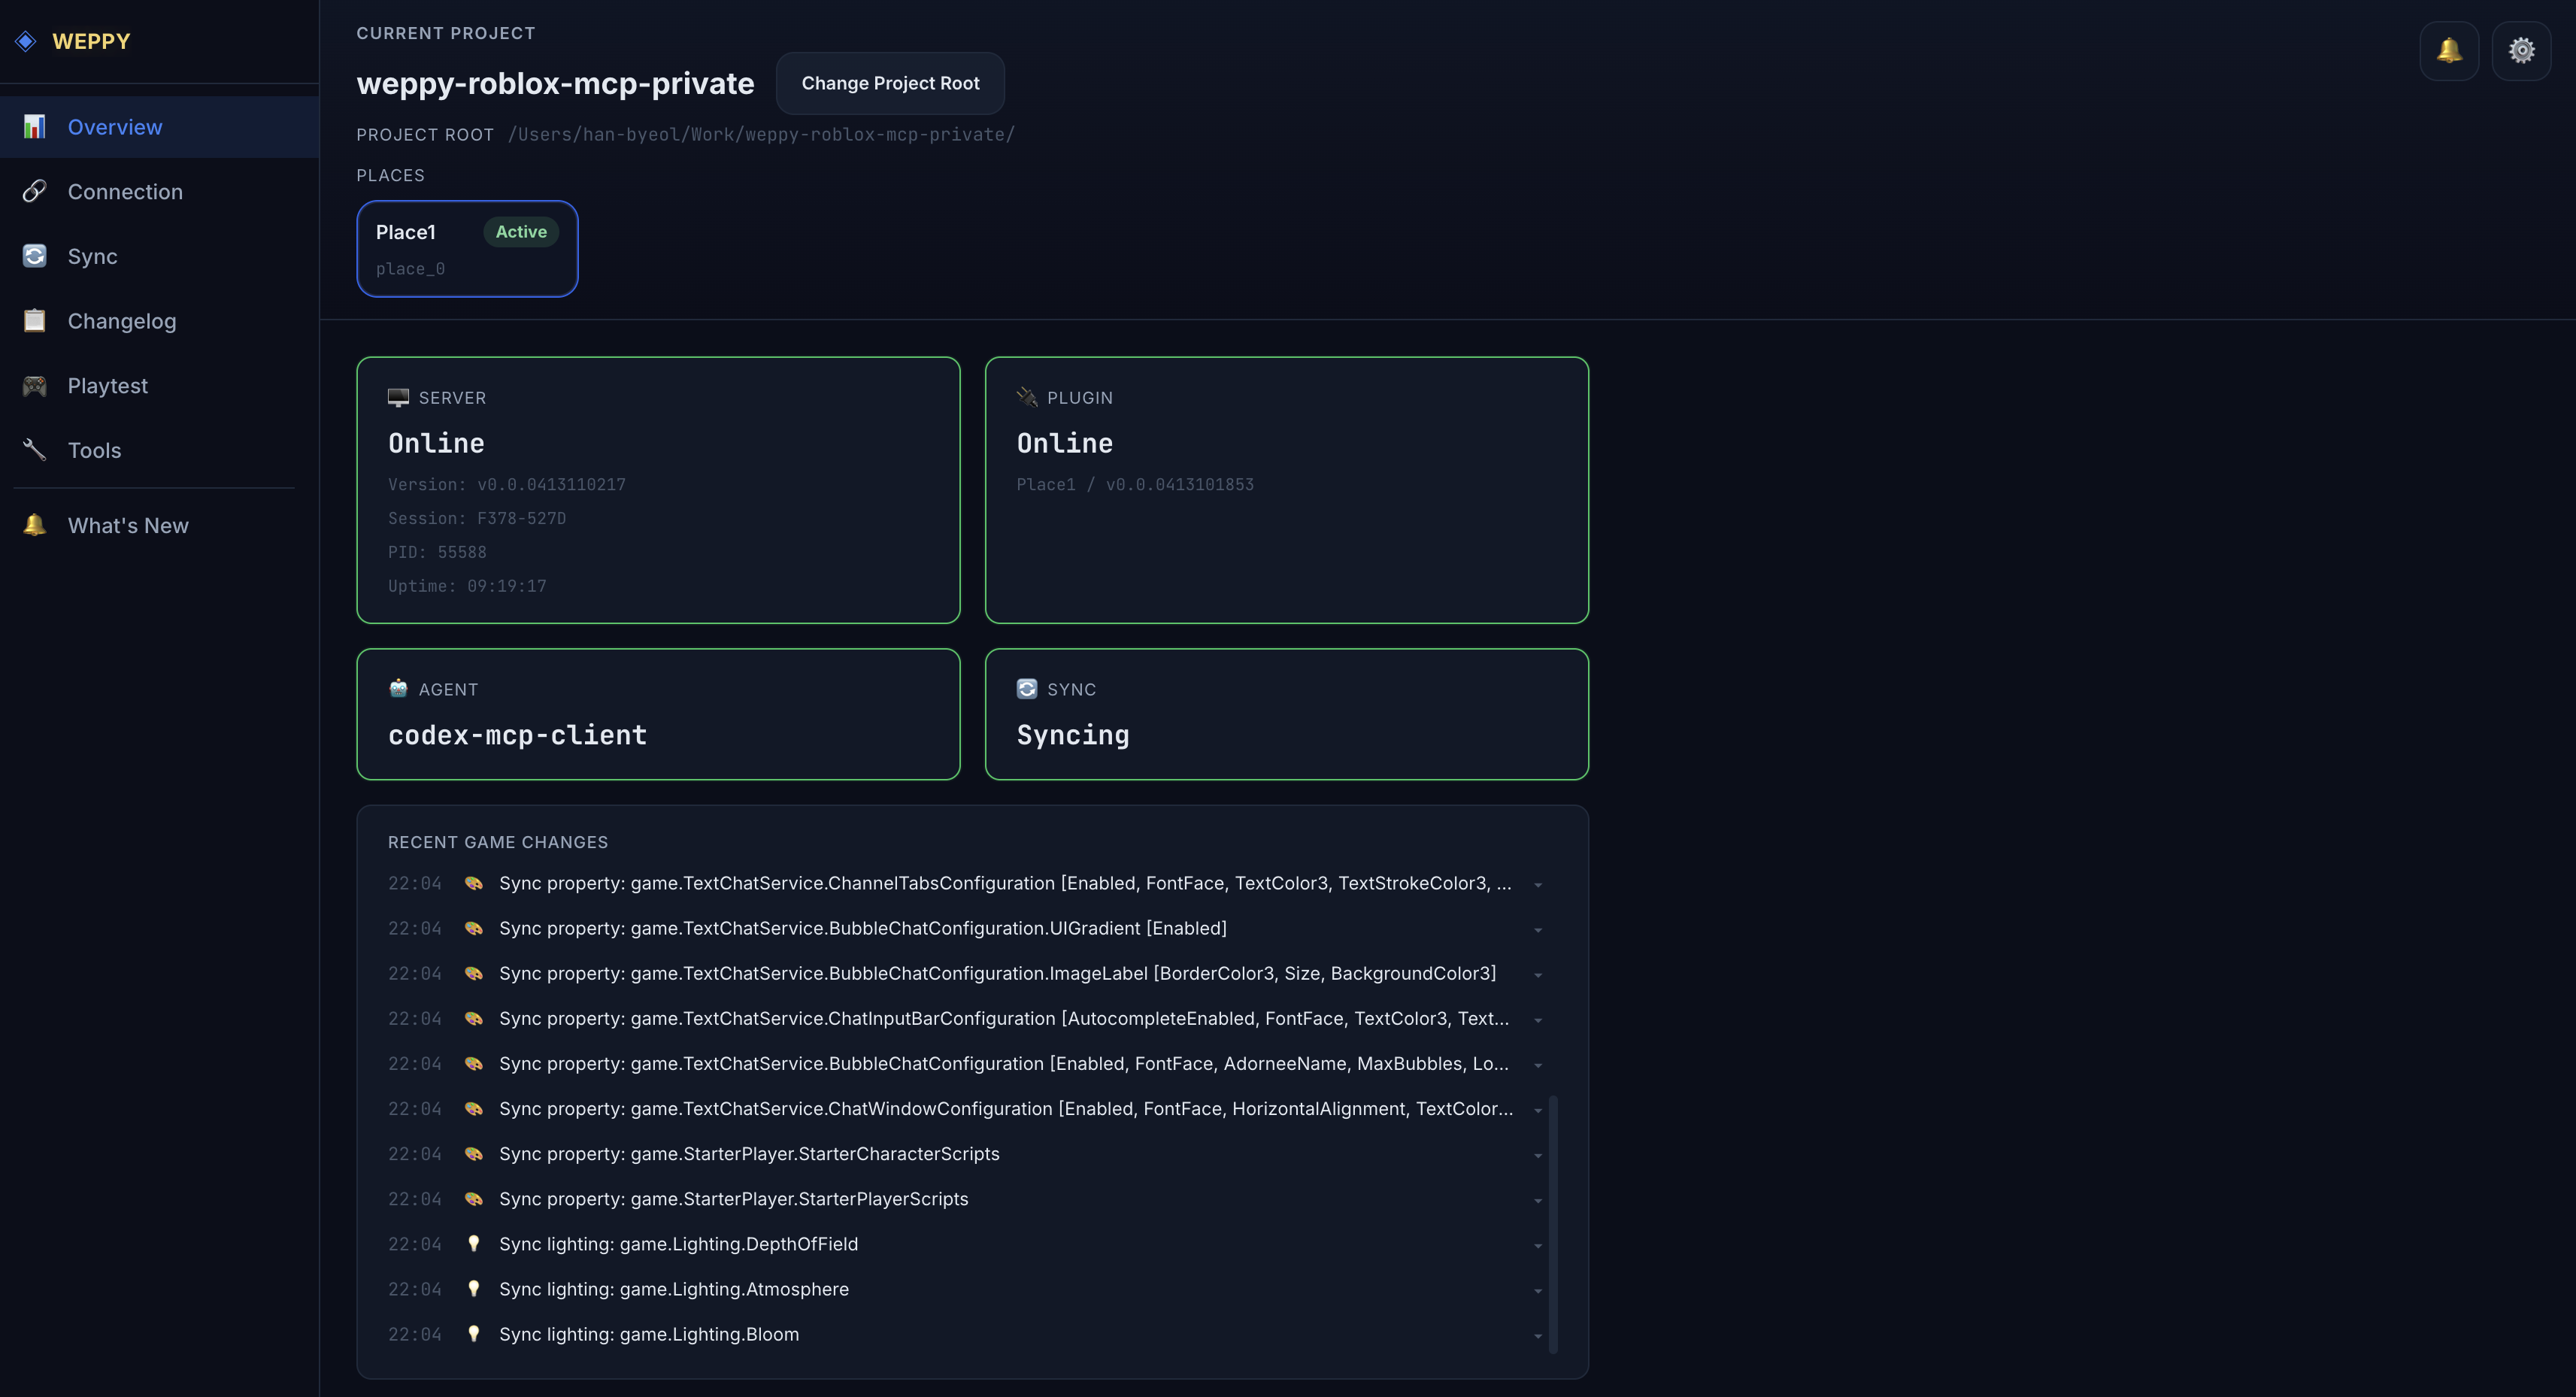
6. WEPPY Dashboard — Real-Time Workflow Monitoring
The web dashboard served by the MCP server lets you check connection status, tool execution history, sync state, and game change history in real time.
- See server / plugin / agent connection status at a glance
- Compare every AI-made change Before & After in the Changelog
- Analyze workflow patterns with tool execution history and statistics
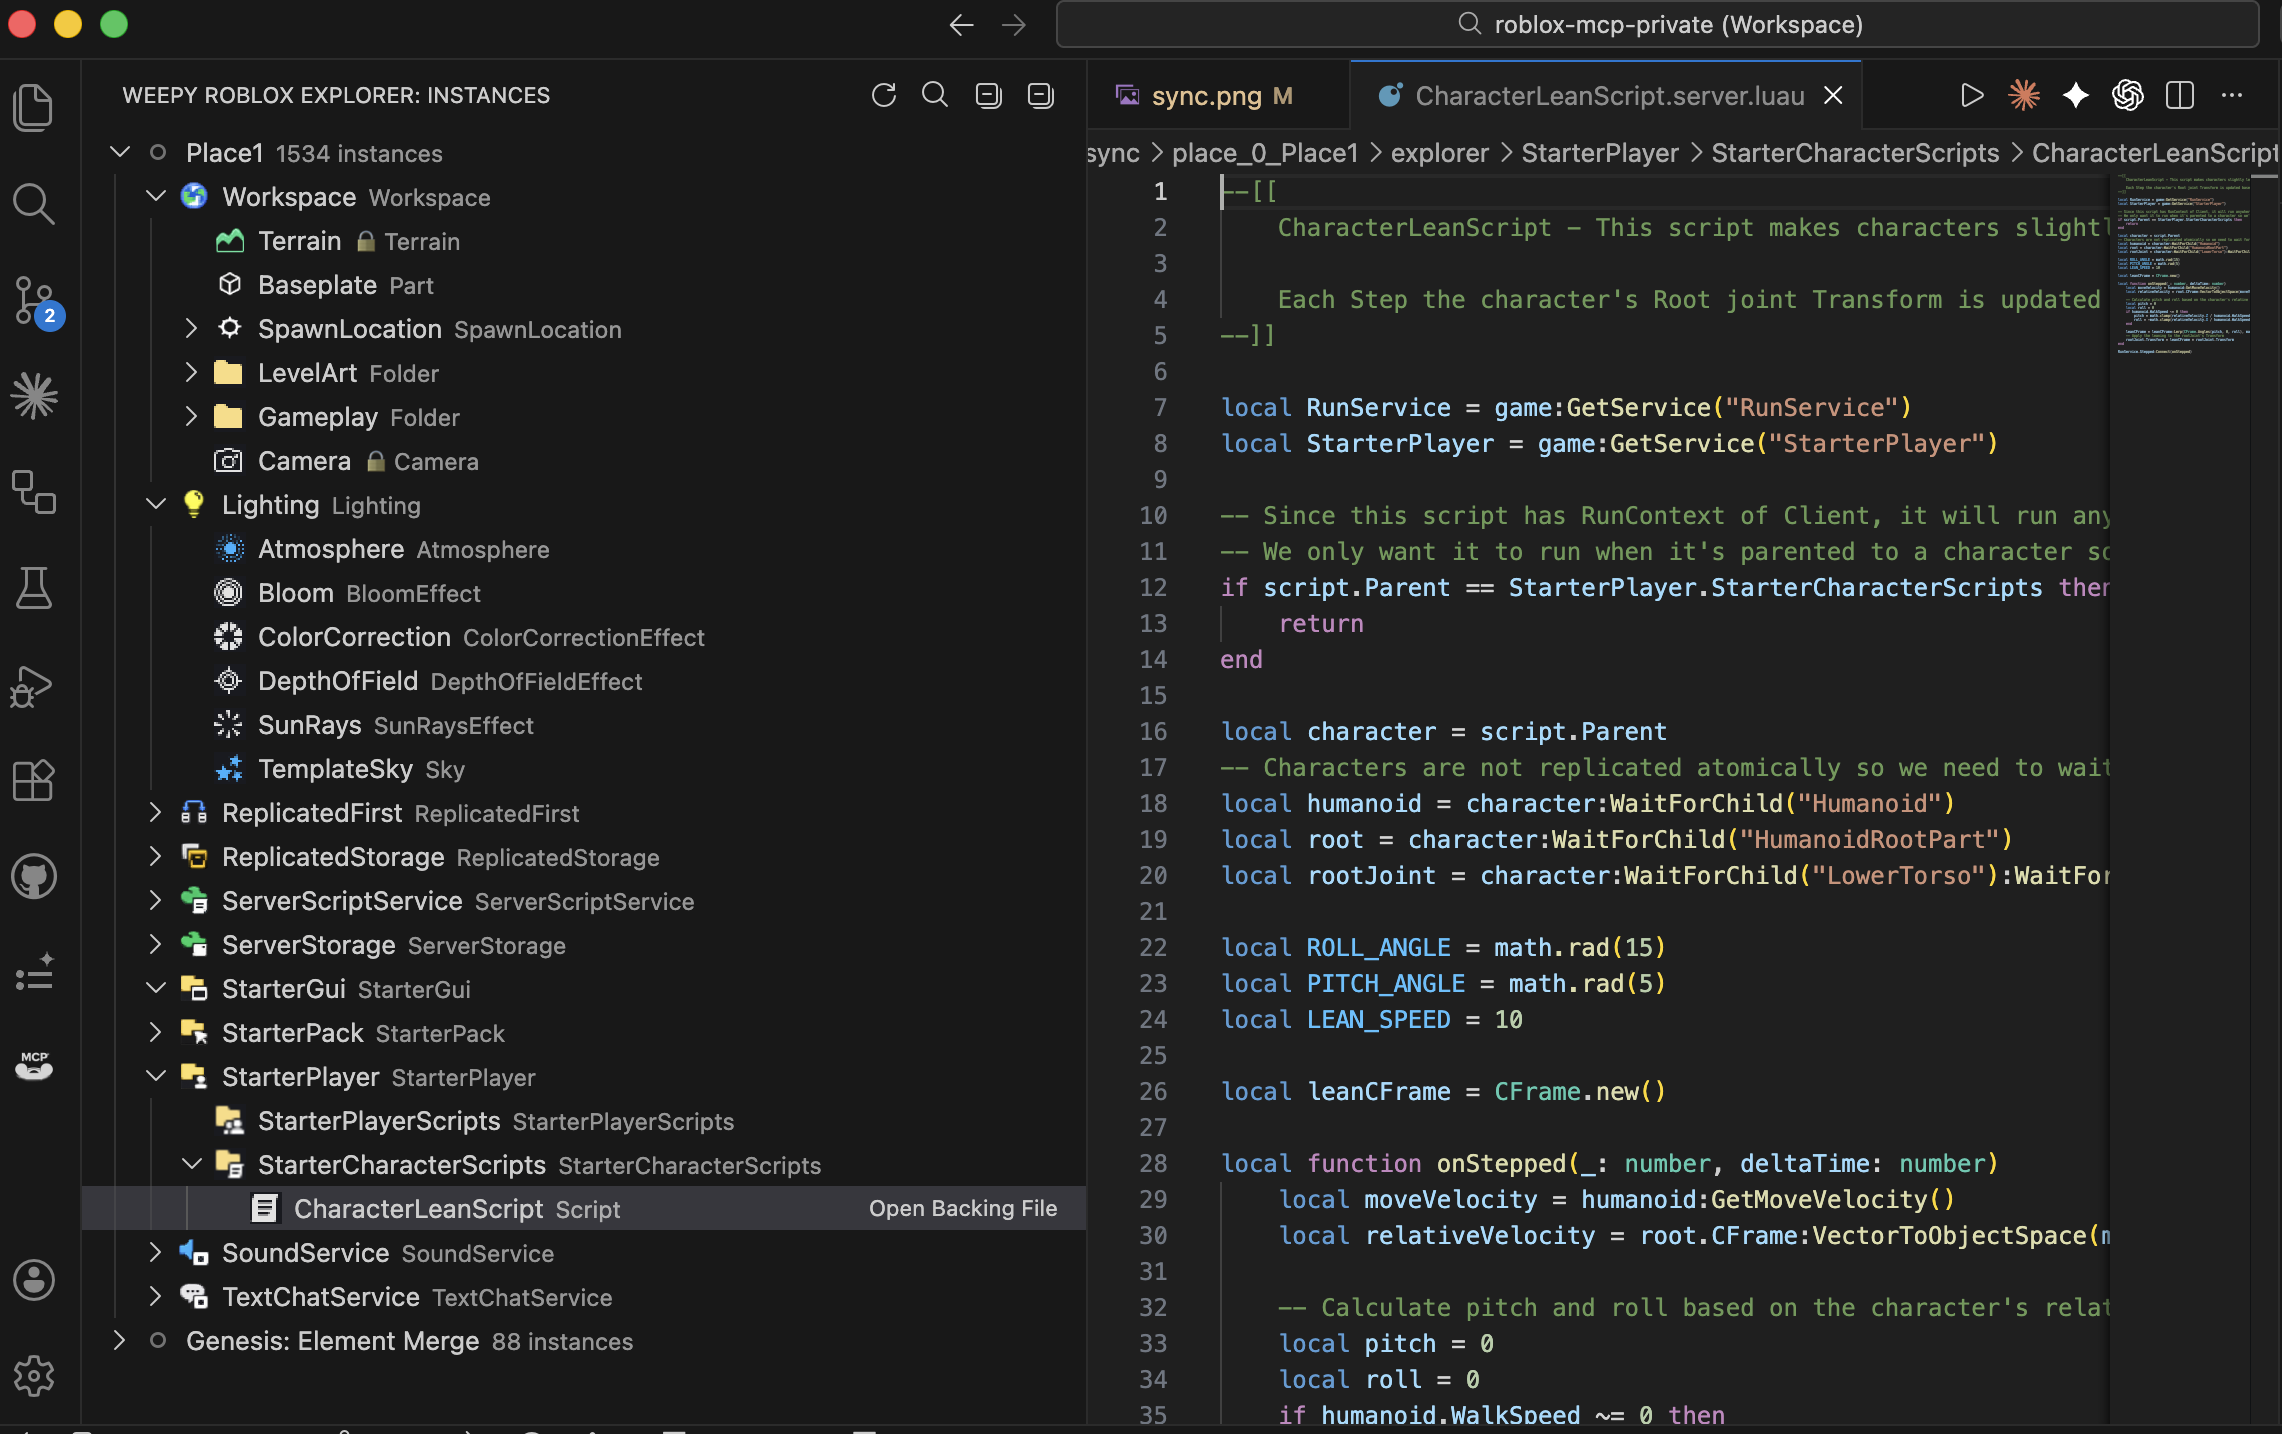
7. WEPPY Roblox Explorer — Browse the Studio Tree in VSCode
View the complete Roblox Studio instance tree directly inside VSCode. Explore services, open synced scripts and property files, and track sync status.
- Intuitive navigation with the same class icons as Studio
- Click to open synced scripts and property files
- Multi-place support with sync status indicators
Use Cases
- Rapid Prototyping — Describe game mechanics in natural language and the AI implements them directly in Studio
- Multi-Place Production — Keep Lobby and Game open in separate Studio windows and split one request across them
- Bulk Refactoring — Change a module interface and update all dependent scripts at once
- Terrain & Environment — Procedural terrain generation, lighting and atmosphere setup, asset placement — all in a single prompt
- Multi-File Consistency — The AI reads the full project via Sync and modifies related scripts together
- Asset Integration — Generate images, upload them to Roblox, apply them to a Place, and insert Creator Store assets without leaving the editor
Compatibility
| Claude Code | Claude Desktop | Cursor | Codex CLI | Codex Desktop | Gemini CLI | Antigravity / Antigravity IDE / Antigravity CLI |
|---|---|---|---|---|---|---|
| ✅ | ✅ | ✅ | ✅ | ✅ | ✅ | ✅ |
Requirements: Node.js 18+, Roblox Studio, Windows 10+ or macOS 12+
FAQ
How do I connect Claude Code to Roblox Studio?
Install the Roblox Studio plugin, then register the MCP server (npx -y @weppy/roblox-mcp@latest) in Claude Code. Claude can then read and write scripts directly inside Studio. See the Claude Code setup guide for the full procedure.
What’s the difference between Basic and Pro?
Basic (free) includes MCP tool execution and one-way sync (Studio → Local). Pro adds multi-place work, Asset Library with Roblox upload, bidirectional sync, bulk operations, terrain generation, spatial analysis, and audio/animation control.
Is it safe? Can AI break my game?
The server only runs on localhost (127.0.0.1:3002). Forbidden paths (CoreGui, CorePackages) are blocked, and a 30-second per-tool timeout prevents runaway operations. All changes are tracked in the sync history.
How is Weppy different from other Roblox MCP servers?
Instead of separating tools by feature, WEPPY uses action-based dispatching to reduce AI token consumption. It also combines Studio ID based multi-place work, Asset Library with Roblox upload, bidirectional project sync, and Playtest control.
Upgrade to Pro
Multi-place work, Assets upload, bidirectional Sync, and Playtest control are available in Pro.