
How to use the WEPPY MCP Server from WEPPY Roblox AI Toolkit with Google Antigravity and Antigravity IDE.
Antigravity is Google’s agent-based development platform where AI agents autonomously perform complex tasks spanning code editing, the terminal, and the browser.
Recommended Setup
Use the one-line installer from the WEPPY install page first. Installing WEPPY AI Agent Plugin requires Antigravity CLI and its agy plugin command. If the CLI is unavailable, the installer keeps Antigravity connected through the shared direct WEPPY MCP Server configuration and links to the official CLI installation guide.
The browser installer configures the WEPPY MCP Server connection. It cannot run agy plugin or confirm that WEPPY AI Agent Plugin was installed.
Prerequisites
- Antigravity / Antigravity IDE installed (see the official docs for supported OS and requirements)
- Node.js (v18.0.0 or higher, with
npxavailable) - WEPPY Roblox Studio Plugin installation complete
Manual MCP Fallback
In Antigravity, MCP servers are managed from the Agent pane. The canonical global fallback is ~/.gemini/config/mcp_config.json; a workspace-only fallback uses .agents/mcp_config.json.
Manual Registration via Raw Config
- In the Agent pane, click ⋯ → MCP Servers → Manage MCP Servers → View raw config
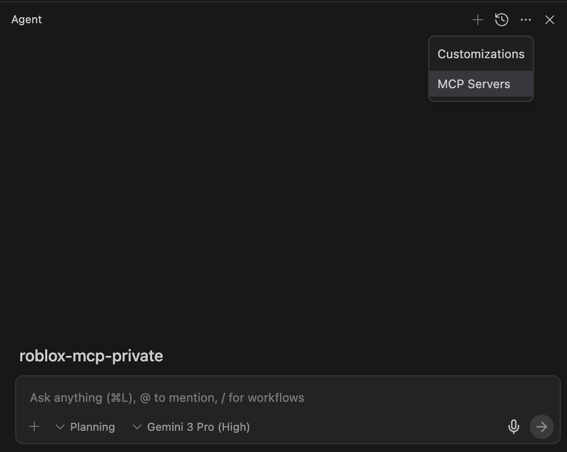
- Add/merge the following into the displayed JSON config:
{
  "mcpServers": {
    "weppy-roblox-mcp": {
      "command": "npx",
      "args": ["-y", "@weppy/roblox-mcp@latest"]
    }
  }
}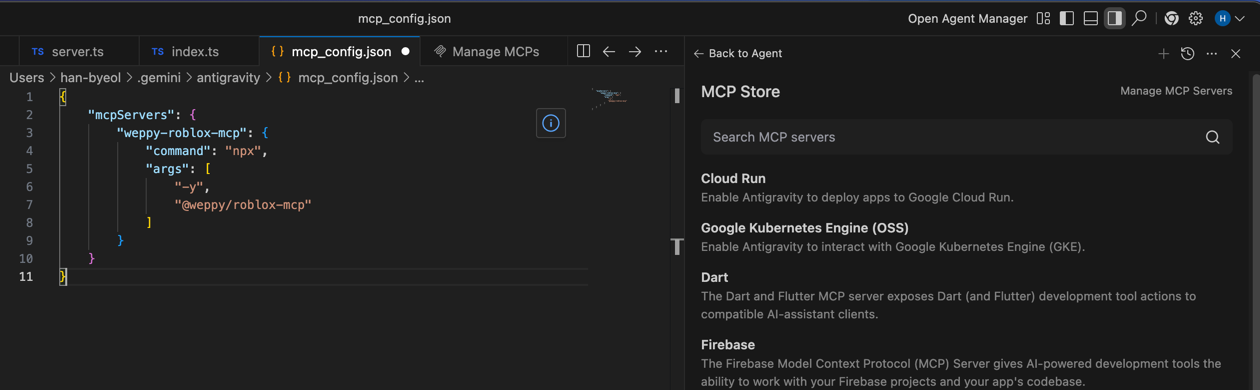
- Save and Refresh (or restart/reload as indicated by the UI)
The actual path and filename of the config file may vary by OS and Antigravity version — always modify the location shown in View raw config.
Optional: Adjust Port/Log via Environment Variables
Keeping the default (HTTP 127.0.0.1:3002) is recommended. If needed, you can set environment variables like this:
{
  "mcpServers": {
    "weppy-roblox-mcp": {
      "command": "npx",
      "args": ["-y", "@weppy/roblox-mcp@latest"],
      "env": {
        "HTTP_HOST": "127.0.0.1",
        "HTTP_PORT": "3002",
        "LOG_LEVEL": "INFO"
      }
    }
  }
}
Connection Test
- Launch Roblox Studio → Plugins tab → WEPPY → Connect
- Enter the following in Antigravity:
Tell me what is currently selected in Roblox Studio
Troubleshooting
Server Won’t Start
Run the MCP server directly to see the error:
npx -y @weppy/roblox-mcp@latestConnection Fails
- Confirm the WEPPY Roblox Studio Plugin shows Connected status
- Check that port 3002 is not blocked by a firewall
- Check server status via ⋯ → MCP Servers in the Agent pane
- (Advanced) If you changed
HTTP_PORT, make sure the WEPPY Roblox Studio Plugin and bridge settings also use the same port.